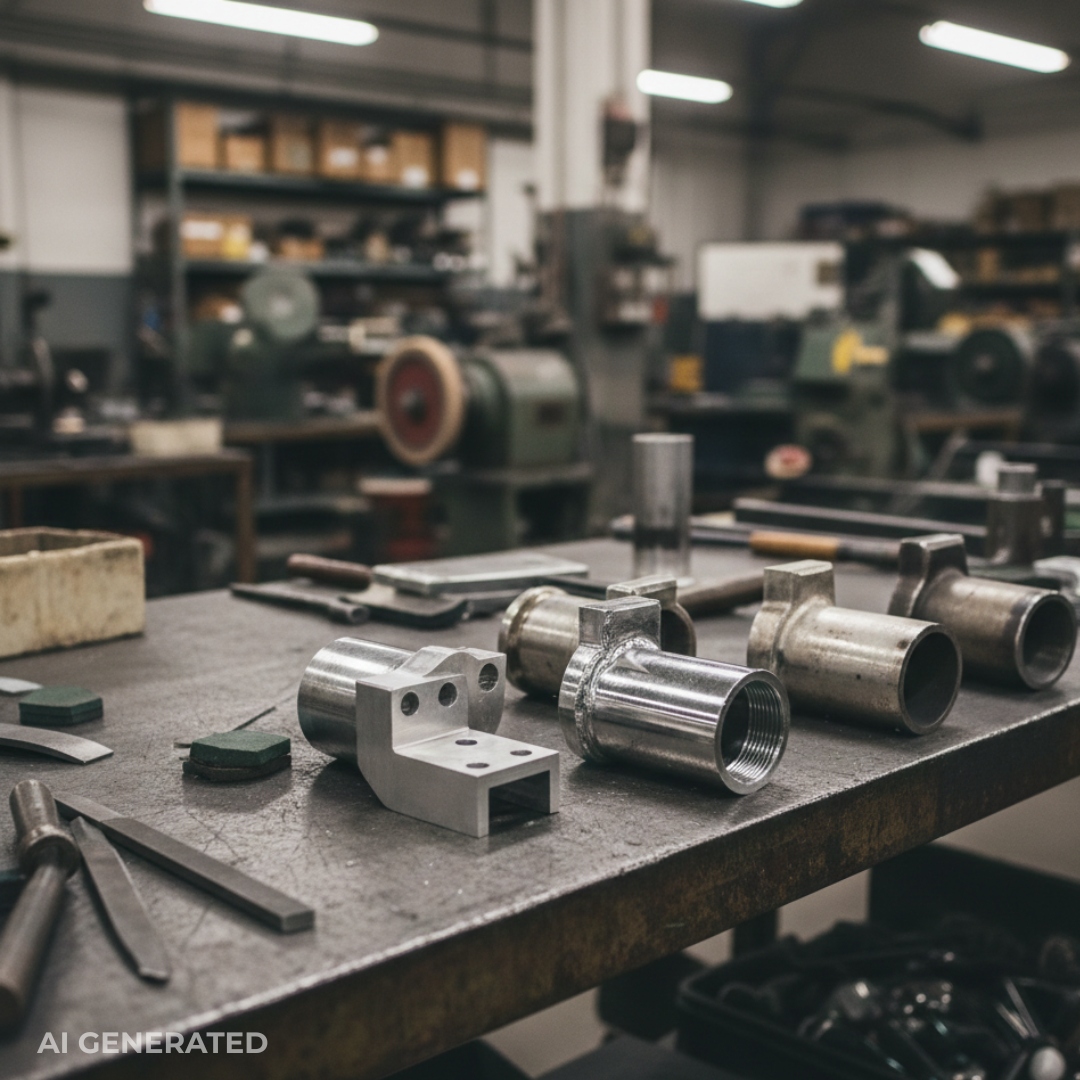
Metal Polishing Processes Compared: 3D Printed vs Cast vs Machined Parts
17 min
- What Is the Main Difference in Polishing 3D Printed, Cast, and Machined Metal Parts?
- Why Are Metal 3D Printed Parts the Most Difficult to Polish?
- What Polishing Challenges Are Unique to Cast Metal Parts?
- Why Are Machined Metal Parts Usually the Easiest to Polish?
- How Do Polishing Workflows Differ Between 3D Printed, Cast, and Machined Parts?
- Which Polishing Methods Work Best for Each Manufacturing Process?
- How Does Part Design Influence Polishing Cost and Feasibility?
- Common Pitfalls
- How Should You Choose the Right Polishing Strategy for Your Metal Parts?
- FAQs about the Metal Polishing Process
What Is the Main Difference in Polishing 3D Printed, Cast, and Machined Metal Parts?
The main difference lies in the starting surface condition and internal structure of the parts. Polishing metal parts requires a removal process to address defects related to the casting process. Cast parts need polishing to normalize their inherently uneven surface, while polishing 3D metal parts refines a geometrically controlled but rough surface. In other words, the goal of polishing changes depending on how the part was made, whether it is defect correction or surface improvement.
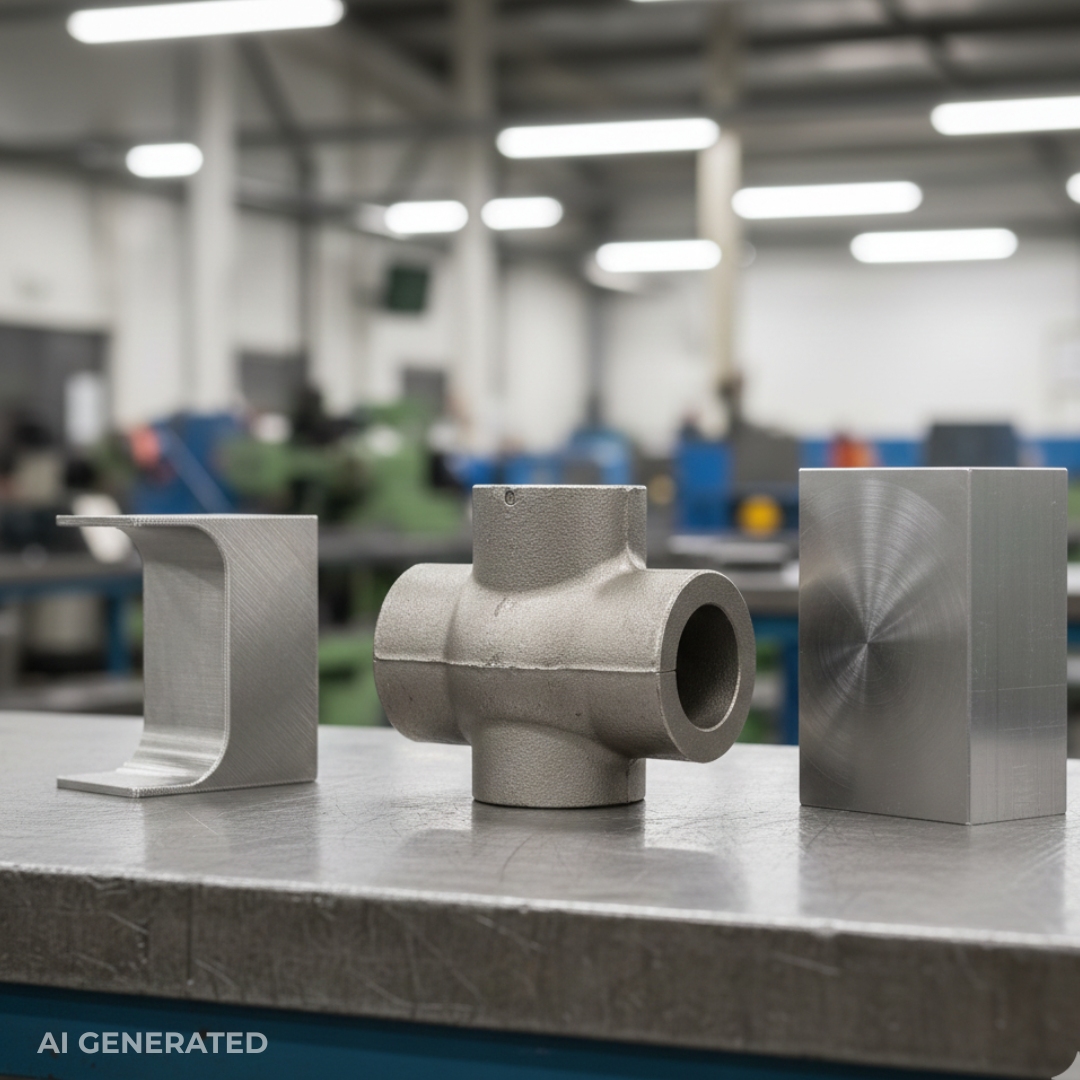
That starting point matters more than many people expect. A machined part often comes off the CNC with a predictable surface roughness, typically in the Ra 1.6–3.2 µm range for standard milling, and lower for fine turning or grinding. Polishing here is incremental. You’re smoothing tool marks, improving appearance, or tightening functional surfaces like sealing faces. The material is already dense and uniform, so the polishing process is straightforward and repeatable.
Cast parts are different. Even with good molds, casting introduces surface waviness, localized rough zones, and skin variations caused by mold texture and cooling rates. Initial Ra values can vary widely across the same part. Polishing cast metal is about surface normalization, bringing inconsistent areas into the same roughness band before any cosmetic or functional finishing can happen.
3D printed metal parts, especially from powder bed fusion, start in the roughest state. As-printed surfaces can exceed Ra 10–20 µm and often include partially fused particles, stair-stepping, and subsurface porosity. Polishing here is defect-driven, not just finish-driven. The process must first remove weak surface features before surface refinement even becomes possible.
This is why the manufacturing method often matters more than the alloy itself when planning polishing. The same stainless steel behaves very differently depending on whether it was printed, cast, or machined, and polishing strategies must account for that reality.
At JLC3DP, this distinction is built into how parts are finished. Our 3D metal printing workflows, especially for polishing binder-jetted 316L stainless steel, are designed around predictable surface behavior and controlled polishing allowances, so finishing improves the part without compromising geometry or function.

Why Are Metal 3D Printed Parts the Most Difficult to Polish?
The metal polishing process is hard because they start ugly, high surface roughness, visible layer lines, and hidden micro-porosity that are baked into the process. Before you even think about fine finishing, you’re forced into aggressive pre-polishing just to make the surface structurally sound and visually consistent.

The challenge begins with the printing process itself. Powder bed fusion (SLM/DMLS) produces dense parts, but the surface is covered in partially fused powder particles and stair-stepping from layer stacking. These particles aren’t just cosmetic, they’re weakly bonded. If you jump straight into polishing, they tear out, leaving pits behind. Binder jetting, on the other hand, starts with an even rougher surface and relies on sintering for strength, which introduces additional porosity and surface variability. Different processes create the same challenge: polishing begins with defect correction, not surface refinement. So, how to polish 3D printed metal parts?
Porosity is the real villain here. As you remove material during polishing, subsurface pores get exposed. What looked smooth after one pass suddenly turns into a constellation of pinholes. That’s why metal 3D printed parts often need multiple cycles of grind → inspect → rework. Unlike machined parts, polishing doesn’t always move you forward in a straight line.
Because of this, pre-processing is unavoidable. Most workflows start with sandblasting or bead blasting to knock down loose particles, followed by manual or CNC grinding to flatten layer lines. Only after that can polishing compounds do their job. Each step removes material, and that’s where risk creeps in.
Dimensional control becomes fragile fast. Thin walls, snap features, or precision bores can drift out of tolerance if polishing isn’t tightly controlled. A few tenths of a millimeter lost during grinding might not sound like much, but in functional assemblies, it’s enough to kill the part.
That’s why, in real production environments like JLC3DP, polishing isn’t treated as a blanket option. Standardized polishing is typically offered only for selected materials, such as binder-jetted 316L stainless steel, where density, porosity, and surface behavior are predictable. Anything outside that quickly becomes case-by-case engineering, not a simple finishing checkbox.
Metal 3D printing delivers incredible geometry freedom, but when it comes to polishing, you pay for that freedom with complexity.
Different metal printing processes expose very different surface structures, which is why material selection in metal 3D printing matters long before polishing metal parts begins.
What Polishing Challenges Are Unique to Cast Metal Parts?
Cast metal parts present a different kind of polishing problem. Unlike 3D printed parts with predictable layer patterns or machined parts with uniform tool marks, cast parts are polished to fix randomness. The goal isn’t refinement, it’s normalization. You’re trying to make an inconsistent surface behave like a consistent one.
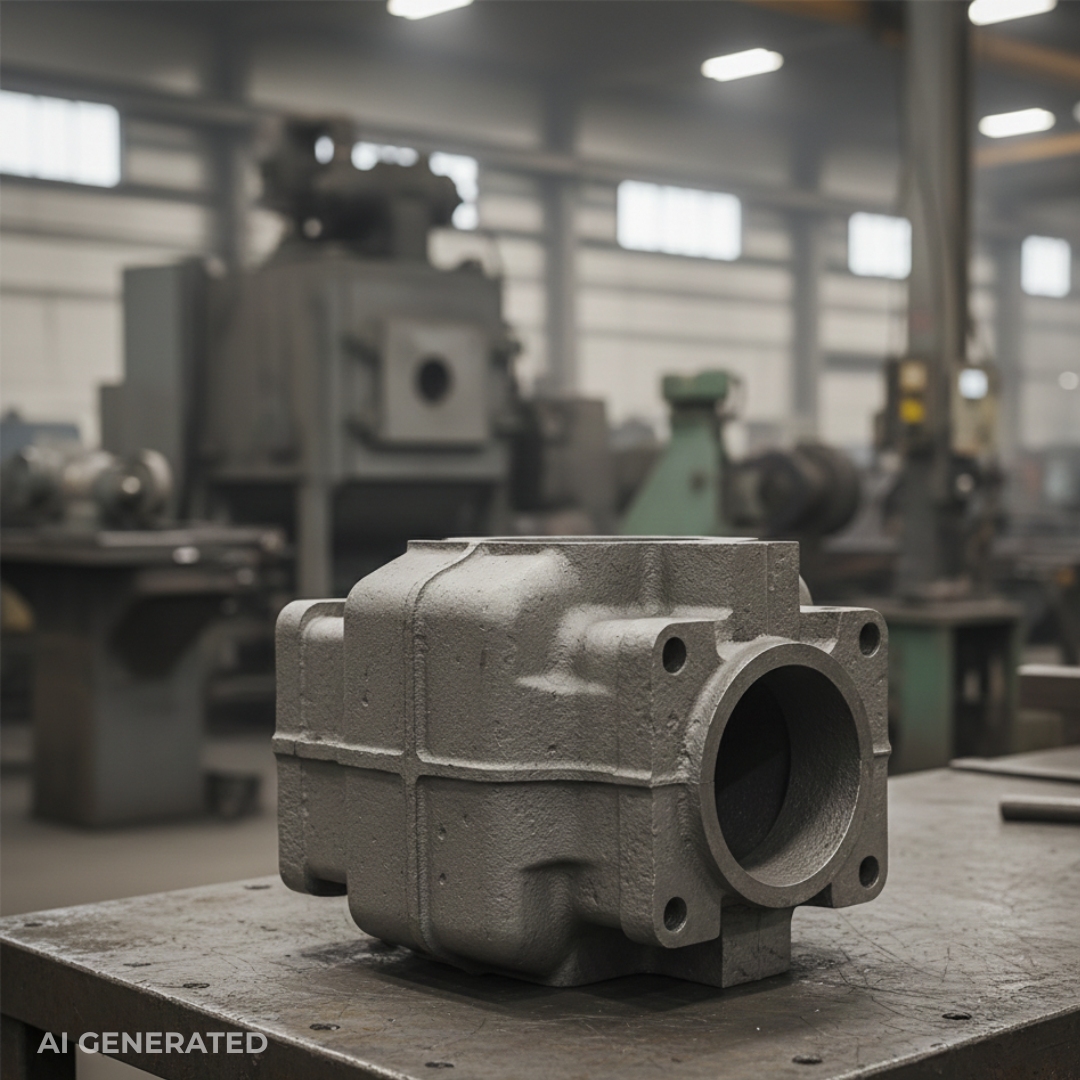
The biggest challenge comes from casting defects that are inherent to the process. Surface porosity, gas holes, shrinkage cavities, cold shuts, and sand inclusions all show up unpredictably. Some are visible immediately; others only reveal themselves once polishing begins. You might smooth one area perfectly, only to uncover a void a few millimeters away that forces rework or localized filling.
The casting method matters a lot. Sand casting produces rough, uneven surfaces with high initial Ra values and embedded sand grains. Polishing often starts with heavy stock removal just to flatten the surface enough for metal finishing. Die casting, by contrast, delivers much smoother surfaces straight out of the mold, but introduces its own issues, flow lines, die wear marks, and flash that tend to concentrate in specific regions. These differences mean polishing strategies must be tailored, even when the material is the same.
Another unique challenge is deciding where to polish. Cast parts often don’t need uniform surface refinement. Instead, polishing becomes a localized repair process, spot grinding around defects, blending repaired areas into surrounding surfaces, and avoiding over-removal elsewhere. Full-surface polishing can be wasteful, risky, and unnecessary, especially for large or structurally critical castings.
Batch-to-batch variability makes things harder. Two castings from the same mold can polish very differently due to slight changes in melt temperature, mold wear, or cooling rates. That unpredictability complicates process planning and makes automated polishing difficult to standardize.
In short, polishing cast metal parts is less about chasing a mirror finish and more about managing uncertainty. Success depends on defect recognition, controlled material removal, and knowing when not to polish, because with castings, every surface tells a slightly different story.
If you’re reading this because polishing is becoming a cost or quality risk, it’s usually not a polishing problem, it’s a manufacturing choice problem.
At JLC3DP, parts are priced and quoted with finishing in mind from the start. Metal 3D printing, CNC machining, and surface finishing are evaluated together, not as separate steps. That’s why pricing stays predictable, even when polishing is involved.
You can upload your STL file and get an instant quote, including material and finishing options, before committing to anything. For many projects, it’s the fastest way to see whether polishing makes sense, or whether a design or process change will save money.
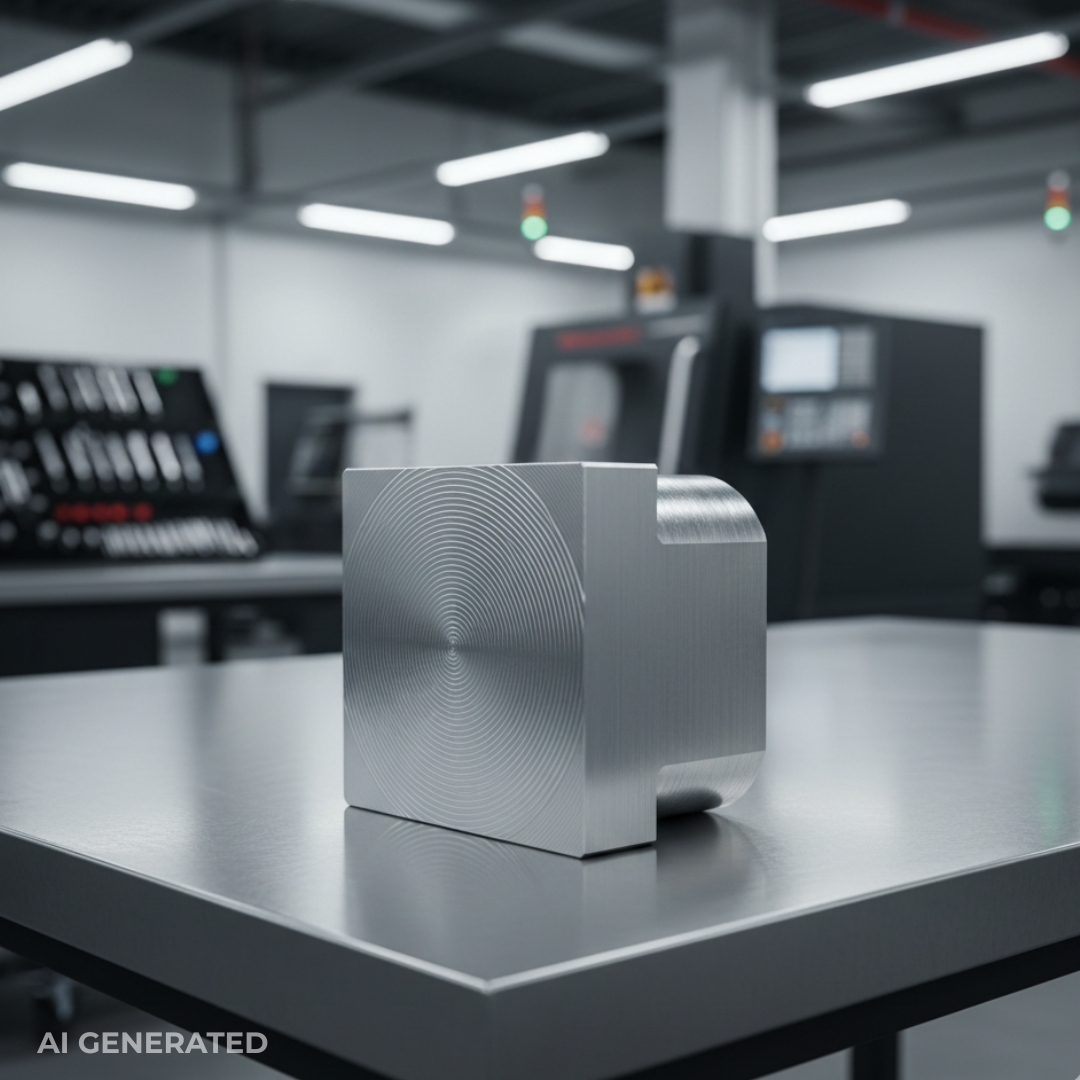
Why Are Machined Metal Parts Usually the Easiest to Polish?
Machined metal parts are, by far, the most straightforward to polish, and it mostly comes down to control. From material structure to surface geometry, almost everything about a machined part is predictable. Polishing isn’t about fixing problems; it’s about refining what’s already there.
Uniform Material Structure Makes a Huge Difference
Machined parts are cut from wrought or billet material that’s dense and homogeneous. There’s no internal porosity, no trapped gas, no hidden voids waiting to appear halfway through polishing. Because the material behaves consistently under abrasion, every polishing pass removes material evenly. That alone eliminates a massive source of risk compared to casting or metal 3D printing.
Tool Path Marks vs Additive Layer Artifacts
The surface features left behind by machining are intentional and repeatable. Tool marks follow known paths, linear, circular, or scalloped, based on cutter geometry and toolpath strategy. Unlike additive layer lines, these marks don’t vary in height or direction unpredictably. Polishing simply smooths them out rather than fighting against changing surface topology.
Controlled Starting Surface Roughness
One of the biggest advantages is the known starting Ra. A well-machined surface might already be in the Ra 1.6–3.2 µm range, sometimes even lower. That means polishing can skip aggressive pre-processing entirely and move straight into medium or fine finishing stages. Less stock removal, less heat, less dimensional risk.
Faster Path to Fine Finishing
Because there are no defects to chase, the transition to fine abrasives happens quickly. Polishing time is shorter, labor is lower, and surface quality improves in a very linear, predictable way. You’re refining peaks, not uncovering surprises.
Predictable Final Surface Quality
All of this leads to one key benefit: repeatability. If a machining process consistently hits the same 3D metal printing surface finish, polishing will consistently deliver the same final Ra. That predictability is why machined parts are the preferred starting point for cosmetic, sealing, or precision-fit applications where surface quality actually matters.
In polishing, fewer unknowns always win, and machined parts have the fewest unknowns of all.
How Do Polishing Workflows Differ Between 3D Printed, Cast, and Machined Parts?
The metal polishing techniques differ mainly in the number of pre-processing steps, the abrasive progression required, and how much material must be removed before a usable surface finish is achieved. In simple terms: the rougher and less predictable the starting surface, the longer and riskier the workflow.
Here’s a quick look at 3D printed vs cast vs machined parts polishing.
Core Comparison of Polishing Workflows
| Aspect | 3D Printed Parts | Cast Parts | Machined Parts |
| Typical starting Ra | Ra 8–20 µm (or higher) | Ra 6–12 µm | Ra 1.6–3.2 µm |
| Surface defects | Layer lines, porosity, partially fused particles | Shrinkage pits, sand texture, inclusions | Tool marks only |
| Pre-polishing steps | Mandatory (blasting, grinding, leveling) | Often required (localized grinding) | Often skipped |
| Abrasive grit range | Very wide (coarse → fine) | Medium → fine | Narrow (mostly fine) |
| Material removal | High and difficult to control | Moderate and localized | Minimal and controlled |
| Process predictability | Low to medium | Medium | High |
| Cost sensitivity | Very high | Medium | Low |
This comparison highlights why workflow length directly drives polishing cost.
Why Workflow Length Drives Cost
Polishing cost is dominated by labor time and scrap risk, not abrasives. Every additional pre-processing step adds handling, inspection, and dimensional uncertainty. Metal 3D printed parts often require multiple coarse stages just to make fine polishing possible, which dramatically increases time per part.
Cast parts sit in the middle. Some areas polish easily, others don’t. The workflow length depends heavily on defect density and casting quality, which makes quoting harder and results less consistent.
Machined parts benefit from short, linear workflows. Less time, fewer steps, and far lower risk of rework.
When Polishing Becomes Economically Impractical
Polishing stops making sense when:
1. Required material removal threatens tolerances
2. Surface defects are deeper than allowed stock
3. Labor time exceeds the value of the part
This happens most often with 3D printed metal finishing, which wasn't designed with post-processing in mind. In contrast, machined parts rarely hit this threshold unless mirror finishes are required.
Which Polishing Methods Work Best for Each Manufacturing Process?
The most effective polishing method depends more on how the part was made than on the metal itself. Mechanical polishing works best for machined parts with predictable surfaces, while electrochemical or hybrid polishing methods are often better suited for metal 3D printed parts that start with high roughness and internal surface complexity.
Machined Parts: Mechanical Polishing First
Machined components respond extremely well to conventional mechanical polishing, belt polishing, wheel polishing, or manual abrasive sequences. The surface already has uniform tool marks and dense material, so polishing focuses purely on smoothing, not defect removal.
Mechanical polishing becomes inefficient only when extremely low Ra values or mirror finishes are required, where multiple fine stages increase time without major gains.
3D Printed Parts: Electropolishing and Hybrid Methods
Additive parts, especially powder bed fusion, often benefit from electropolishing. Unlike mechanical methods, electropolishing removes material evenly at a microscopic level, reducing roughness without chasing individual peaks and valleys created by layer lines.
That said, electropolishing alone is rarely enough. Most production workflows use a hybrid approach:
1. Mechanical or abrasive blasting to remove high peaks
2. Followed by electropolishing to smooth residual roughness
This combination improves consistency while minimizing dimensional risk.
Cast Parts: Targeted Mechanical + Vibratory Finishing
Cast parts typically require localized mechanical polishing to address defects like pits or parting lines. For higher volumes, vibratory or tumbling processes work well to normalize surface texture across multiple parts simultaneously.
Chemical polishing may be used in specific alloys, but variability in casting quality often limits how aggressive these methods can be.
Why Hybrid Workflows Dominate Production
In real manufacturing environments, single-method polishing is rare. Hybrid workflows balance speed, consistency, and cost, especially when surface finish requirements are tight, but tolerances still matter.
How Does Part Design Influence Polishing Cost and Feasibility?
Polishing cost is usually locked in before polishing even starts. Geometry choices, surface finish requirements, and tolerance decisions made during design and manufacturing have a far bigger impact on polishing effort than the polishing method itself.
Geometry Drives Labor, Not Just Finish
Sharp internal corners, deep pockets, blind holes, internal channels, and undercuts are some of the biggest cost drivers. These features are hard, or sometimes impossible, to reach with conventional polishing tools. In practice, that means more manual work, custom tooling, or accepting uneven finishes. For metal 3D printed parts, internal features can be especially problematic because polishing may expose porosity or leave rough zones that can’t be corrected without removing excessive material.
The Cost of Over-Specifying Surface Finish
One of the most common mistakes is calling out mirror or cosmetic finishes on surfaces that don’t need them. Every step down in Ra value requires disproportionately more time and material removal. A functional mating surface might justify fine polishing, but demanding the same 3D print metal finish on non-critical faces quickly inflates cost with little real benefit.
Designing with Polishing Allowance
All metal surface polishing techniques involve some level of material removal. If the design leaves no allowance, achieving the target finish can push dimensions out of tolerance. This is especially important for binder-jetted and other additive parts, where pre-polishing steps like blasting or grinding are unavoidable. Adding controlled stock for polishing makes results more predictable and reduces scrap risk. Learn the design rules for metal 3d printing.
Design-for-Polishing Principles
Good design anticipates finishing. Favor accessible surfaces, avoid unnecessary internal cosmetics, specify finishes only where function demands it, and align tolerances with realistic material removal.
For binder-jetted stainless steel parts, services like JLC3DP’s standard metal polishing assume defined surface allowances. Accounting for that early in design is often the difference between a clean, economical finish and an expensive redesign.
Common Pitfalls
This is the part most technical guides skip, but it’s where things actually go wrong on real jobs.
One of the biggest mistakes I see is treating 3D printed metal parts like machined parts. On paper they’re both “metal,” but in polishing they behave nothing alike. Additive parts don’t have the same density or surface predictability, so applying machining-style polishing assumptions almost always leads to rework, blown tolerances, or ugly surface breakouts.
Another painful lesson: removing too much material too early. Aggressive grinding feels efficient at first, especially when the surface looks rough. But once you overshoot, there’s no undo. I’ve seen parts pass dimensional checks before polishing and fail immediately after because someone chased a visual improvement too fast instead of stepping through controlled grit progressions.
Porosity is the silent killer here. Ignoring porosity exposure after polishing is how parts that looked “fine” suddenly fail inspection. As material comes off, subsurface voids open up. What starts as a smooth finish can turn into peppered defects that no amount of fine polishing will hide. This is especially common with metal 3D printed parts and certain casting methods.
Finally, people consistently underestimate polishing time in cost models. Polishing isn’t linear. Each improvement in surface finish costs more time than the last, especially once you move past basic functional finishes. When polishing is treated as an afterthought instead of a planned process, budgets fall apart fast.
These aren’t theory mistakes. They’re the ones that show up after parts are already made, and that’s when fixing them gets expensive.
How Should You Choose the Right Polishing Strategy for Your Metal Parts?
The right polishing strategy comes from balancing how the part was made, what the surface actually needs to do, and how much cost and risk you’re willing to accept, not from blindly chasing the smoothest possible finish.
Start by separating functional surfaces from cosmetic ones. Threads, sealing faces, mating surfaces, and fatigue-critical zones deserve controlled polishing. Hidden or non-contact areas usually don’t. Over-polishing everything is one of the fastest ways to waste money and lose tolerances.
Next, consider prototyping versus production. In low-volume or prototype work, manual or hybrid polishing may be acceptable. In production, repeatability matters more than perfection. If the polishing workflow isn’t predictable, it’s not scalable.
Finally, know when polishing is the wrong solution entirely. If hitting a target Ra requires excessive material removal, long cycle times, or post-polish repair, that’s often a design problem, not a finishing problem. Redesigning geometry, adjusting manufacturing method, or relaxing surface requirements can be far more effective than forcing a polish that fights the part’s natural structure.
Good polishing decisions are made early, informed by process realities, not late, under pressure to “make it look better.”
If polishing cost, finish quality, dimensional risk, or metal finishing for additive manufacturing is still unclear, the fastest reality check is a quote. Upload your part to JLC3DP and see how manufacturing method and finishing actually affect price, before you commit to production.
FAQs about the Metal Polishing Process
Q1: Is polishing always necessary for metal parts?
No. Many functional parts perform perfectly with as-printed, as-cast, or as-machined finishes. Polishing should serve a purpose, not aesthetics alone.
Q2: Which parts benefit most from polishing?
Sealing surfaces, sliding interfaces, visible cosmetic areas, and fatigue-sensitive features see the most value from controlled polishing.
Q3: Can polishing fix poor surface quality from manufacturing?
Only to a point. Severe porosity, waviness, or dimensional issues usually can’t be polished away without creating new problems.
Q4: Why does polishing cost increase so quickly at higher finishes?
Each reduction in surface roughness requires finer abrasives, more time, tighter control, and greater risk; cost rises exponentially, not linearly.
Q5: Should polishing be considered during design?
Absolutely. Geometry, tolerances, and surface specs determine polishing feasibility long before finishing ever begins.
Keep Learning
Metal Surface Polishing: Methods, Roughness & Ra Guide
Key Takeaways Metal surface polishing is not a cosmetic step—it is a controlled Ra reduction process that directly impacts friction, corrosion resistance, and coating adhesion. Different polishing methods are defined by achievable Ra ranges, not by process names. Mechanical, electrochemical, and mass finishing methods are not interchangeable—they operate in different geometry and production constraints. Selection rule: choose polishing method based on target Ra + geometry accessibility + production vo......
Can You 3D Print Metal at Home? Costs & Methods
Key Takeaways Not a Single Step: Metal 3D printing at home is a multi-stage process (Printing + Debinding + Sintering). The initial "green part" is a fragile composite, not functional metal. High Hidden Costs: While metal 3d printers for home are cheap, the specialized furnaces required for sintering cost $10,000–$30,000 and carry significant safety risks. Performance Limits: DIY parts often suffer from high porosity and unpredictable 15-20% shrinkage, unlike industrial SLM/BJ which reaches 99%+ densi......
Metal Polishing Processes Compared: 3D Printed vs Cast vs Machined Parts
What Is the Main Difference in Polishing 3D Printed, Cast, and Machined Metal Parts? The main difference lies in the starting surface condition and internal structure of the parts. Polishing metal parts requires a removal process to address defects related to the casting process. Cast parts need polishing to normalize their inherently uneven surface, while polishing 3D metal parts refines a geometrically controlled but rough surface. In other words, the goal of polishing changes depending on how the p......
Metal 3D Printing: An Overview Of The Technology And Its Process
What is Metal 3D Printing? Metal 3D printing, also known as additive manufacturing or metal additive manufacturing, creates three-dimensional items by selectively depositing or melting metal powders layer by layer. Electron beam melting (EBM) and selective laser melting (SLM) are two approaches used to accomplish this. To conventional manufacturing techniques, metal 3D printing offers enhanced design flexibility, intricate geometries, and great precision in producing complex and customized metal parts......
Selective Laser Melting (SLM) vs. Direct Metal Laser Sintering (DMSL)
Selective Laser Melting (SLM) and Direct Metal Laser Sintering (DMLS) stand as prominent players within the realm of metal 3D printing, each characterized by its unique approach. In the DMLS process, a high-powered laser follows a CAD model to selectively melt and sinter layers of metal powder. This method results in partial fusion of powder particles, offering versatility in material selection while potentially introducing slight porosity and variations in mechanical properties. On the other hand, SL......