Why Your 3D Prints Need Threaded Inserts: MJF & SLA Guide
18 min
- 3D Printed Threads vs Inserts: Which Is Stronger?
- When to Use Threaded Inserts in 3D Printed Parts
- Heat-Set Inserts for 3D Printing Explained
- Designing Threads for 3D Printing (Before Choosing Inserts)
- HP MJF and SLA Design Guidelines for Threaded Inserts
- Installing Threaded Inserts in 3D Printed Parts
- Common Mistakes When Installing Inserts
- Choosing the Right Insert & Material
- FAQ about Heat-set Inserts and Printed Threads
This is where engineers typically weigh two options: printing threads directly into the part, or installing threaded inserts for 3d printed parts.
Both approaches have their place. Printed threads can work well for quick prototypes or lightly loaded components. But when parts need to be assembled repeatedly, carry higher loads, or survive real product use, threaded heat set inserts for 3D printing often become the better solution.
JLC3DP’s professional 3D printing services now include a dedicated Threaded Insert Service. By integrating 8 types of M3, M4, and M5 brass inserts directly into your parts, we provide the reliable, repeatable assembly performance that printed threads simply can’t match.

This guide walks through the practical engineering side of the decision. We’ll look at when 3D printing threads are sufficient, when inserts are the safer choice, and how to properly design parts for inserts when working with processes like MJF and SLA. Along the way, we’ll also cover hole design, insert installation, and the differences between inserts used in nylon parts versus threaded inserts in resin prints.
The goal is helping designers make stronger, more reliable threaded connections in printed parts.
3D Printed Threads vs Inserts: Which Is Stronger?
 One of the most common questions engineers ask when designing threads for 3D printing is whether printed threads alone are strong enough. The answer depends largely on how the part will actually be used.
Printed threads are formed directly in the plastic during the build process. With technologies like HP MJF, these threads can be surprisingly clean and functional, especially for larger fasteners. For quick prototypes or housings that only get assembled once or twice, they can work perfectly well.
The problem usually shows up later.
Plastic threads tend to wear down quickly when screws are installed repeatedly. The material slowly compresses and deforms under torque. After a few assembly cycles, the screw may start to feel loose or lose its ability to hold proper clamping force.
Threaded inserts solve that problem by introducing a metal thread into the printed part. Instead of the screw engaging directly with plastic, it engages with hardened metal threads that resist deformation and maintain consistent clamping force.
That difference becomes especially noticeable in parts that experience vibration, frequent maintenance, or repeated assembly during testing.
For design considerations that improve thread reliability, our guide on considerations for 3D printing threads covers dimensional limits and structural best practices.
Feature | 3D Printed Threads | Threaded Inserts |
|---|---|---|
Pull-out Strength | Lower | Higher |
Reusability | Limited | Excellent |
Durability | Moderate | High |
Pull-out strength improves significantly because the insert’s knurled geometry transfers load into the surrounding boss instead of relying solely on plastic threads.
Torque resistance also improves. With printed threads, over-tightening can strip the plastic fairly easily. Inserts provide a much wider safety margin before failure occurs.
Then there’s long-term use. A screw driven into printed plastic threads repeatedly will eventually wear the material down. Inserts avoid that issue entirely, since the screw always engages with metal threads rather than polymer.
For that reason, most engineers treat printed threads as a quick prototype solution, while inserts are used for parts expected to function more like traditional manufactured components.
When to Use Threaded Inserts in 3D Printed Parts
When deciding between 3D printed threads vs inserts, it’s important to understand when threaded inserts for 3D printing become necessary. There are several situations where threaded inserts for 3D printing become the more reliable choice. Inserts are typically used when parts must handle higher loads, repeated assembly, or long-term mechanical use.
1. Repeated Assembly
Plastic threads tend to wear down quickly when screws are installed and removed multiple times. If a component will be opened frequently for maintenance or testing, threaded inserts provide durable metal threads that maintain clamping force over many cycles.
2. High Torque Applications
When screws must be tightened firmly, printed threads can easily strip or deform. Inserts distribute the load into the surrounding boss geometry, allowing the part to withstand much higher tightening torque.
3. Vibration Environments
In assemblies exposed to vibration, such as robotics, automotive parts, or machinery, plastic threads may gradually loosen. Metal inserts provide more stable threads and reduce the risk of fastener failure over time.
4. Thin Plastic Walls
In some designs, the surrounding material may not be thick enough to support strong printed threads. Inserts allow reliable threaded connections even when wall thickness is limited, because the knurled exterior of the insert transfers loads more effectively into the surrounding material.
For many functional parts, this is why engineers often compare 3D printed threads vs inserts early in the design process to determine which approach will provide the most reliable connection.
For engineers developing functional parts with threaded connections, material choice and print accuracy are just as important as insert design. JLC3DP offers industrial SLA and HP MJF 3D printing services optimized for functional prototypes, helping ensure accurate hole dimensions and reliable insert installation.
Heat-Set Inserts for 3D Printing Explained
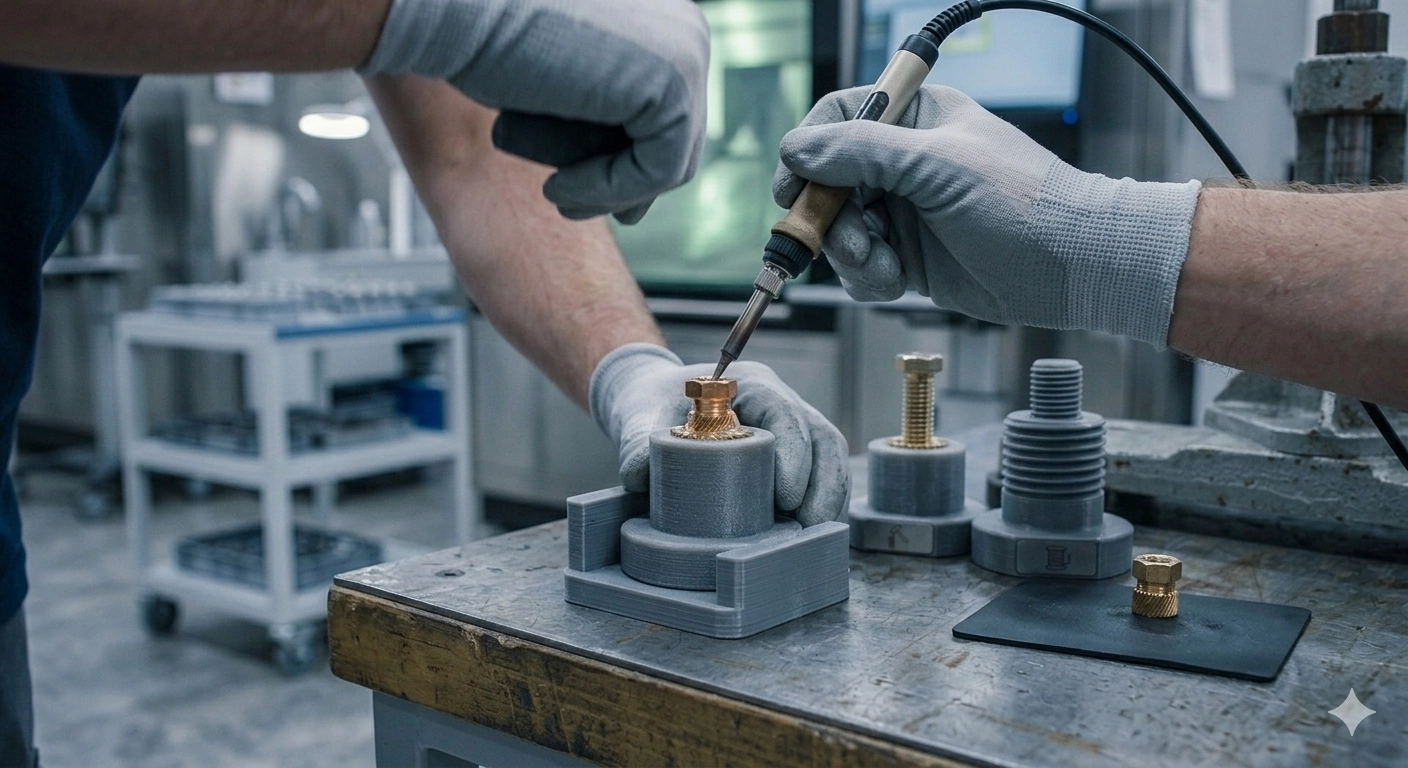
(AI generated) Technician installing a heat-set insert into a 3D printed part in a workshop.
When engineers talk about heat set inserts 3D printing, they’re referring to a small metal insert, usually brass, that gets permanently embedded into a plastic part using heat. Once installed, the insert provides durable internal metal threads that behave much closer to traditional machined hardware.
The idea is simple but effective.
Instead of cutting threads directly into plastic, the printed part contains a slightly undersized hole designed to accept the insert. A heated installation tip (often attached to a soldering iron or dedicated insert press) warms the insert as it is pressed into the hole. The surrounding polymer softens just enough to allow the insert to sink in.
As the plastic cools, it solidifies around the insert’s knurled exterior features, locking it firmly in place.
The result is a threaded connection that combines the lightweight geometry of 3D printing with the strength and wear resistance of metal threads.
This is why threaded heat set inserts for 3D printing are widely used in functional prototypes, production nylon parts, and consumer product housings.
Most heat insert 3D print applications rely on brass inserts, and there are a few practical reasons for that.
First, brass conducts heat extremely well. That means the insert warms quickly and evenly during installation, allowing the surrounding plastic to soften without requiring excessive force.
Second, brass machines cleanly, which makes it easy to manufacture the fine internal threads and the aggressive knurled outer geometry that helps anchor the insert inside the plastic.
Finally, brass offers a good balance between strength, corrosion resistance, and cost. For most engineering applications, from electronics housings to mechanical brackets, it provides more than enough durability.
Material Compatibility: PLA vs Nylon vs Resin
Material | Compatibility with Heat-Set Inserts | Notes |
|---|---|---|
PLA (FDM) | Works, but limited durability | Softens at low temperatures and can become brittle; inserts may loosen with heat or repeated stress. Best for low-load hobby parts. |
Nylon (MJF/SLS) | Excellent | Softens predictably and flows around insert knurls, creating strong mechanical bonding. Ideal for durable threaded connections in functional parts. |
Resin (SLA) | Not ideal for heat installation | Resin is brittle and does not soften like thermoplastics; heat can cause cracking. Use press-fit or adhesive-installed inserts instead. |
Advantages of Heat-Set Inserts
Using threaded heat set inserts for 3D printing offers several clear engineering benefits:
- Metal threads resist stripping under higher torque
- Threads survive repeated assembly cycles
- Stronger pull-out resistance than printed threads
- More reliable clamping force in functional assemblies
- Compatible with standard machine screws
These advantages are why threaded inserts for 3D prints are commonly used in parts that move beyond simple prototypes and start behaving like real mechanical components.
Limitations to Consider
Despite their benefits, inserts are not always the perfect solution.
They add extra assembly steps, which increases manufacturing time for large part volumes. The surrounding boss geometry also needs to be designed carefully so the insert doesn’t split the plastic during installation.
Additionally, inserts require sufficient wall thickness around the hole to maintain structural integrity.
Quick Pros and Cons
Pros
- Strong, durable metal threads
- Excellent resistance to wear and stripping
- Supports repeated assembly and disassembly
- Higher torque capacity
Cons
- Requires post-processing installation
- Adds hardware cost
- Needs proper boss and hole design
- Not ideal for brittle resin materials
Designing Threads for 3D Printing (Before Choosing Inserts)
Before adding hardware like inserts, it’s worth understanding how threads in 3D printed parts behave on their own.
Minimum Printable Thread Size
One of the most common mistakes when designing threads for 3D printing is choosing thread sizes that are simply too small for the printing process to resolve accurately.
As a general rule:
Thread Size | Suitability for Printed Threads |
|---|---|
M2 – M2.5 | Usually too small; detail loss likely |
M3 | Borderline; depends on printer resolution |
M4 – M6 | Reliable for most applications |
M8 and above | Excellent for printed threads |
Very small threads often lose definition because layer resolution and voxel size round off the thread profile. When possible, designing for M4 or larger dramatically improves reliability.
If smaller hardware is required, inserts or post-tapping are typically the safer solution.
Recommended Thread Pitch
Thread pitch plays an important role in how well a thread for 3D printing forms.
Fine threads may look good in CAD but often struggle during printing because the shallow profile becomes blurred by layer stepping.
Coarser threads perform much better because they create deeper valleys and sharper crests that remain visible after printing.
Print Orientation and Thread Strength
Orientation has a direct impact on how strong threads in 3D printed parts will be.
If the thread axis is aligned with the Z-axis (vertical printing), each thread ridge forms from stacked layers. This produces cleaner geometry but slightly weaker shear strength along layer boundaries.
If the thread axis lies in the XY plane, the thread walls are printed within layers, which can increase shear strength but may reduce surface smoothness.
In practical engineering terms:
- Vertical threads usually produce cleaner thread geometry because layers follow the thread profile.
- Horizontal threads may offer slightly higher shear strength due to stronger layer bonding.
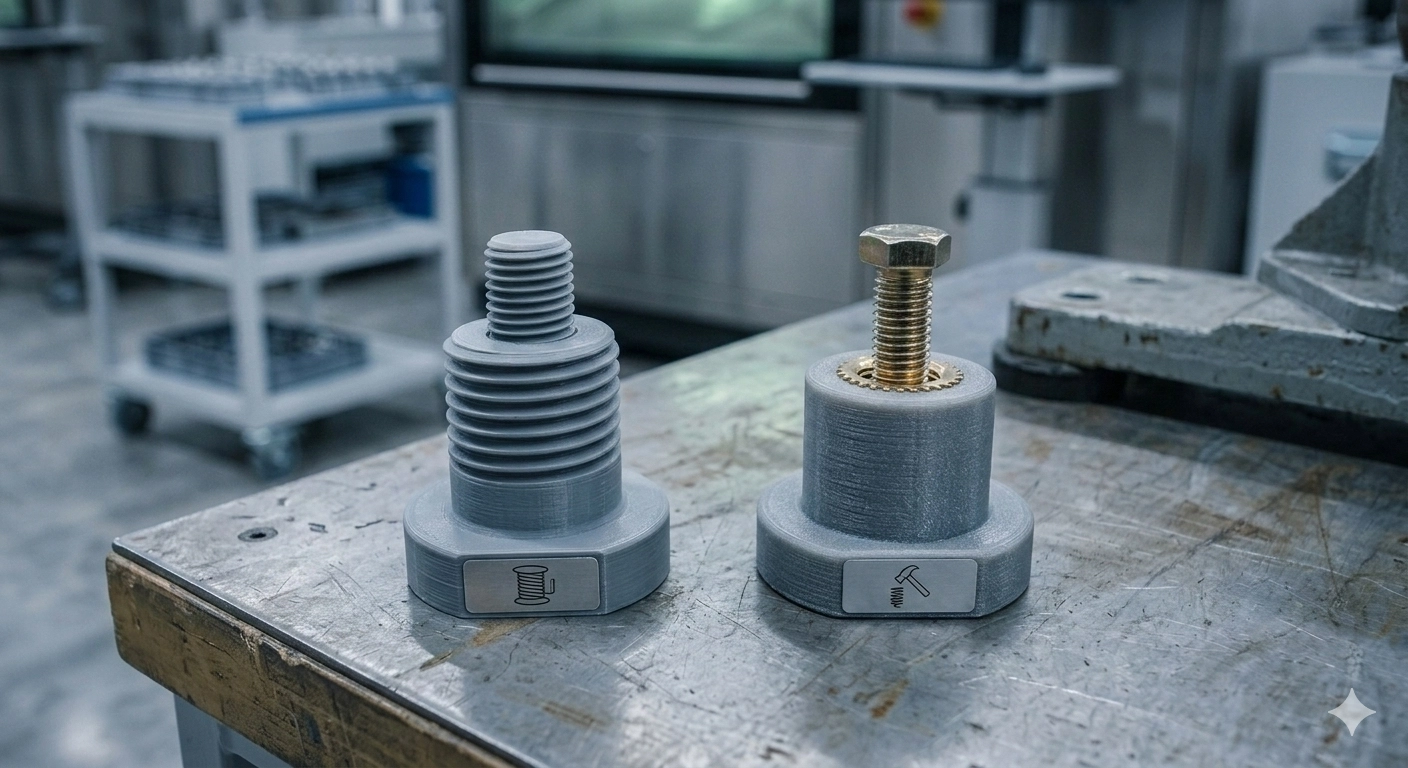
For most parts, vertical orientation is preferred because it preserves thread definition.<img class="help-image" src="https://rs.jlc3dp.com/static/image/blog/3dprintingdesign/3d-printed-threaded-samples.webp" alt="3d printed threaded samples"
The printing technology also influences how well printed threads behave.
SLA (Resin Printing)
SLA produces very sharp surface details thanks to its high XY resolution. Threads often come out extremely clean, which makes 3D printing threads viable even for smaller sizes. However, resin materials are more brittle, which can limit torque capacity.
MJF (Nylon Powder Bed Printing)
MJF produces slightly softer edges than SLA, but the nylon material is much tougher and more flexible. This makes threads in MJF parts more resistant to stripping under moderate loads.
In real-world product design:
- SLA threads: higher detail but lower toughness
- MJF threads: slightly rougher but mechanically stronger
HP MJF and SLA Design Guidelines for Threaded Inserts
Once you start building real assemblies with printed parts, 3d printing threads usually stop being enough. They work for light-duty screws, but the moment a fastener is tightened more than once, or sees any real load, those threads start wearing out.
That’s where inserts come in.
Using threaded inserts for 3d printing turns a printed plastic part into something that behaves much closer to a machined component. But the insert itself is only half the equation. The surrounding geometry, the hole size, boss diameter, and wall thickness, determines whether the insert locks in securely or pulls out the first time someone torques the screw.
Designing for inserts in MJF nylon or SLA resin isn’t difficult, but there are a few rules engineers learn quickly after a couple of failed prototypes.
Hole Size for Threaded Inserts
One mistake that shows up constantly in early designs is using the manufacturer’s hole dimension straight from the insert datasheet.
Those numbers assume precisely machined holes.
3D printed holes rarely come out perfectly. Powder sintering, resin curing, and voxel rounding almost always shrink the hole slightly compared to the CAD model. If you model the exact nominal size, the insert will often feel tighter than expected, or worse, crack the boss during installation.
A small amount of compensation usually solves the problem.
Insert Size | Recommended Hole (MJF Nylon) | Recommended Hole (SLA Resin) |
|---|---|---|
M3 | 4.2–4.3 mm | 4.1–4.2 mm |
M4 | 5.6–5.7 mm | 5.5–5.6 mm |
M5 | 6.8–7.0 mm | 6.7–6.9 mm |
These values work well for most threaded heat set inserts for 3d printing made from brass.
MJF nylon tolerates slightly larger holes because the material softens and flows a little when the insert is installed. Resin parts behave differently, since the material is more brittle, a tighter hole generally gives better retent eventually print a small insert test block with a few different hole diameters to see which one locks best for their printer and material.

Wall Thickness Around the Insert
Even if the hole size is correct, inserts can still cause problems if the surrounding walls are too thin.
During installation, the insert expands the material around it slightly. Later, when a screw is tightened, the load spreads outward into the boss. If there isn’t enough material there, the part will crack or split.
A safe rule most designers follow:
- Minimum wall thickness: 1.5× insert diameter
- Preferred wall thickness: ~2× insert diameter
So if you’re installing an M3 insert, the surrounding boss should ideally be around 6–7 mm in diameter.
That extra material dramatically improves pull-out strength.
Boss Diameter Guidelines
Instead of placing inserts directly into flat geometry, they’re usually installed inside cylindrical bosses. This helps distribute the stress from the screw into a larger volume of material.
Typical boss sizes look like this:
Insert Size | Recommended Boss Diameter |
|---|---|
M3 | 6 mm |
M4 | 8 mm |
M5 | 10 mm |
These numbers aren’t strict limits, but shrinking the boss too much increases the risk of cracking, especially when working with threaded inserts in resin prints.
Shrinkage Differences between MJF and SLA
The printing process itself also changes how holes behave.
MJF (PA12 Nylon)
Parts shrink slightly as the powder cools after fusion. This usually makes holes print a bit smaller than the CAD model.
SLA Resin
Resin prints experience chemical shrinkage during curing. The dimensional change is smaller, but the bigger issue is brittleness. Resin bosses don’t flex as much during insert installation.
Because of this, MJF parts generally tolerate heat-set inserts very well, while resin parts sometimes benefit from press-fit or adhesive-installed inserts instead.
Heat Considerations for Resin Parts
Installing heat-set inserts involves temperatures around 180–220℃. Nylon handles that heat easily, but many SLA resins don’t.
If the tool sits in the hole too long, the surrounding plastic can soften unevenly or develop micro-cracks.
For resin parts, engineers often:
- Install inserts more slowly
- Use lower temperatures when possible
- Or switch to press-fit inserts entirely
Installing Threaded Inserts in 3D Printed Parts
Once the part is printed and the hole geometry is correct, the next step is actually installing the insert. This is where many otherwise solid designs fail.
Installing threaded inserts for 3d printing is simple in principle, but technique matters. Too much heat, too much force, or the wrong tool can distort the surrounding plastic and ruin the hole.
In practice, there are three common ways engineers handle threading 3d printed parts with inserts: heat installation, press-fit installation, and adhesive bonding.
Heat Installation
Heat installation is the most common method, especially for heat set inserts 3d printing applications in thermoplastics like PLA, PETG, ABS, and nylon.
The idea is straightforward. The insert is heated so that the surrounding plastic ron works surprisingly well as long as the temperature is controlled.
Typical temperatures range between 180℃ and 220℃, depending on the plastic.
PLA softens quickly, while nylon requires slightly more heat.
Installation process
- Align the insert with the hole before applying heat.
- Heat the insert using the soldering iron tip.
- Apply light downward pressure. Let heat do the work.
- Once the insert reaches the surface of the part, remove the heat.
- Hold the insert steady for several seconds while the plastic cools.
Trying to force the insert mechanically while it’s cold almost always damages the hole.
Press-Fit Installation
Press-fit inserts rely purely on mechanical interference. The hole is designed slightly smaller than the insert so that the insert locks into the material when pressed in.
This approach works well in:
- MJF nylon parts
- tough engineering resins
- thicker structural components
Press-fit installation is sometimes used when threaded inserts in resin prints cannot tolerate the heat of a soldering tool.
A small arbor press or drill press usually provides enough control for installation.
The key is slow, even pressure. Hammering inserts into printed parts often damages the surrounding plastic.
Adhesive Bonding
Adhesive installation is less common but still useful in specific situations.
If the printed material is brittle or the hole has already loosened, epoxy can provide a reliable backup method.
A small amount of two-part epoxy or structural adhesive is applied to the outer surface of the insert before installation.
After curing, the adhesive bonds the insert to the surrounding plastic.
This technique is sometimes used for threaded inserts in resin prints, where heat installation risks cracking the part.
Post-installation finishing can improve appearance and durability, see our guide on post-processing 3D prints for practical techniques.
Common Mistakes When Installing Inserts
Most insert failures come from installation mistakes rather than design errors.
A few problems show up repeatedly:
1. Overheating the insert
If the insert gets too hot, the surrounding plastic becomes overly soft. Instead of forming clean knurls, the insert sinks too deep or deforms the hole.
2. Misalignment during installation
Once the insert begins entering the plastic, correcting the angle becomes difficult. Crooked inserts often ruin the thread alignment for the screw.
3. Too little surrounding material
Even perfectly installed inserts will fail if the boss diameter is too small. The plastic simply doesn’t have enough strength to resist torque.
With proper installation technique, threaded inserts for 3d printing dramatically improve durability compared to printed threads alone.
Choosing the Right Insert & Material
Selecting the right insert material matters just as much as choosing the insert type. In most applications, brass inserts for 3D prints are the default choice because brass conducts heat well, installs cleanly with heat tools, and bonds effectively with thermoplastics like nylon, ABS, and PLA.
Stainless steel inserts are typically reserved for harsher environments. If a part will experience high temperatures, repeated tightening cycles, or mechanical vibration, stainless steel offers higher wear resistance and long-term durability. The trade-off is that they’re harder to install and usually require press-fit or molded installation rather than heat.
Extra caution is needed with threaded inserts in resin prints. SLA and other resin materials are more brittle than thermoplastics, so aggressive heat installation can cause cracking around the boss. In many cases, press-fit inserts or adhesive bonding produce more reliable results.
Quick decision guide:
- Need easy installation in thermoplastics → Brass heat-set inserts
- High-temperature or heavy mechanical loads → Stainless steel inserts
- Brittle resin parts → Press-fit or adhesive-installed inserts
FAQ about Heat-set Inserts and Printed Threads
Q1: Are heat-set inserts stronger than printed threads?
A: Yes. Heat-set inserts are significantly stronger because the metal threads resist wear and distribute load better than plastic threads.
Q2: Can you use inserts in resin prints?
A: Yes, but resin parts are more brittle, so press-fit or adhesive installation is often safer than heat installation.
Q3:What is the best thread for 3D printing?
A: Coarse metric threads with larger pitch generally print more reliably and resist stripping better in 3D printed parts.
Q4: Do MJF parts require hole compensation?
A: Yes. HP MJF design guidelines recommend slight hole compensation to account for thermal shrinkage and powder sintering effects.
Q5: What are threaded inserts for 3D printing?
A: Threaded inserts for 3D printing are metal fasteners embedded into plastic or resin parts to create durable internal threads. They allow screws to be installed repeatedly without stripping the printed material and provide stronger, more reliable connections than printed plastic threads.
They are commonly used in functional 3D printed parts that require higher torque, repeated assembly, or long-term mechanical strength. Inserts can be installed using heat-set, press-fit, or adhesive methods depending on the material and application.
Keep Learning
Why Your 3D Prints Need Threaded Inserts: MJF & SLA Guide
Designing reliable threads in plastic parts is one of those details that seems simple until a prototype actually gets assembled. A screw may go in fine the first time — maybe even the second. After that, the threads start to loosen, plastic begins to deform, and the joint slowly loses its grip. This is where engineers typically weigh two options: printing threads directly into the part, or installing threaded inserts for 3d printed parts. Both approaches have their place. Printed threads can work well......
How to smooth 3d prints:6 Methods for a Perfect Finish
In the field of 3D printing, the surface quality of the finished product directly affects its appearance and functionality. Although 3D printing technology has made great progress, due to the principle of stacked printing, obvious layer lines often appear on the finished product, which not only affects the visual effect, but may also affect its performance in some applications. Therefore, it is particularly important to smooth the 3D printed parts. Smoothing can not only enhance the appearance of the ......
Electroplating 3D Prints Explained: Process, Materials, and Tips
(source: Reddit/BrodieMakes) There comes a point in every maker's journey when plastic just isn't enough. Maybe you're working on a cosplay part that needs that authentic metal sheen. Maybe your prototype needs a tougher shell. Or maybe, you just want your 3D prints to scream "premium." Let’s take a look at electroplating 3D prints, the process that gives humble plastic the look (and in some cases, the durability) of real metal. But before you bust out the battery acid and wire, let's break down what ......
Best Glue for PLA 3D Prints
When bonding PLA 3D prints, choosing the right glue can ensure a strong and long-lasting bond. Different types of glue have their own characteristics in terms of usage, curing time, and applicable scenarios. This article will introduce three experimentally verified glues and summarize their characteristics and application methods. Source: https://ecoreprap.com/3d-printing/how-to-glue-pla/ This article refers to Andrew W's evaluation of various glues for bonding PLA in the video. To ensure the reliabil......
How to Polish 3D Prints at Home
Polishing 3D prints at home can significantly improve their appearance, making them smoother and more professional-looking. Here are several methods you can use, depending on the material of your 3D print and the tools you have available: 1. Sanding ● Materials Needed: Sandpaper (various grits: 200, 400, 600, 800, 1000, 2000), sanding sponge, or rotary tool with sanding attachments. ● Process: ○ Start with a coarse grit (e.g., 200) to remove large imperfections and layer lines. ○ Gradually move to fin......
Electroplating 3D Printing: A Way to Enhance 3D Printed Parts
Electroplating is the process of coating a thin layer of real metal (such as copper, nickel, gold) on the surface of 3D printed parts, which not only improves the appearance of the product and obtains a metallic luster, but also enhances its functionality and durability. Although this post-processing process is complex and requires careful operation, it is an economical and efficient alternative to metal printing. This article will introduce in detail the principles and operation procedures of electro......