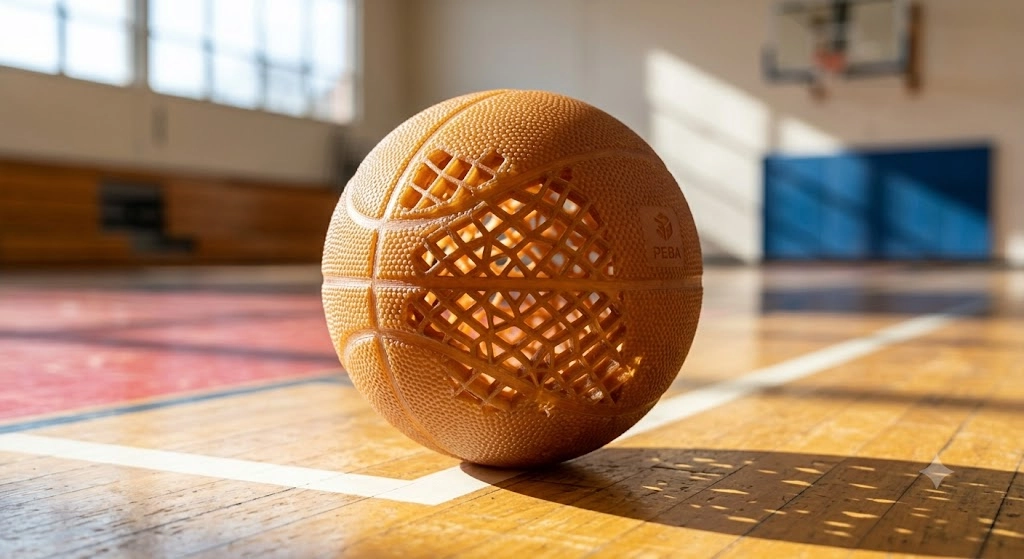
How to 3D Print a Perfect Airless Basketball Without Failing
17 min
- What Makes a 3D Printed Airless Basketball Bounce?
- What STL Should You Use for an Airless Basketball?
- Should You Use TPU or PEBA?
- Why Do Most TPU Airless Basketballs Fail the Bounce Test?
- Is PEBA the Secret to a Realistic Bounce?
- What Print Settings Work Best?
- How Long Does It Take & How Much Filament is Needed?
- Trouble-Shooting: Why Most Airless Basketball Prints Fail
- The Fastest Path to Build a Functional Airless Basketball
- FAQ about Printing an Airless Basketball
To figure out how to 3D print an airless basketball that actually bounces, you need four things:
- A proven airless basketball STL
- A bounce-optimized material (TPU or PEBA)
- Correct print settings
- A lattice structure designed for energy return
Most failed prints are not caused by the printer itself. They fail because the material or structure cannot efficiently return energy during impact.
This guide breaks down the exact community-tested STL files, the ultimate showdown between TPU and PEBA materials, and the precise slicer settings you need to print a fully playable game ball without wasting filament.
What Makes a 3D Printed Airless Basketball Bounce?
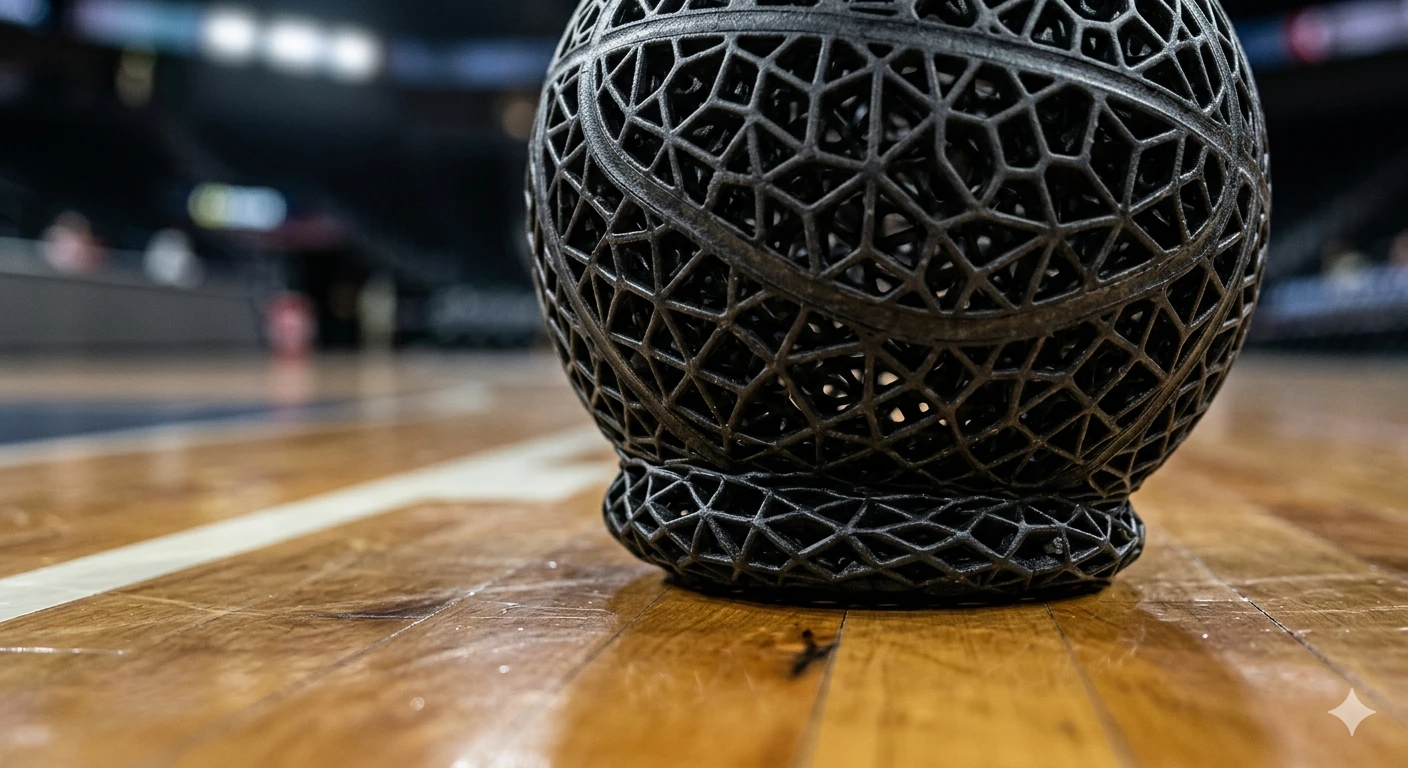
The bounce in a 3D printed airless basketball comes from two things working together: the lattice structure and the material's ability to return energy. It has very little to do with softness alone.
A lot of people trying to learn how to 3D print airless basketball designs make the same mistake. They assume that using the softest filament available will automatically create the best bounce. That's rarely true.
The real secret behind a successful airless basketball 3D print is energy return. When the ball hits the ground, the lattice compresses, stores energy, and then releases that energy fast enough to push the ball back upward. If either the structure or material fails at that job, the ball feels dead no matter how good it looks.
Recent community discussions have highlighted this clearly. In a Reddit thread that generated more than 15,000 upvotes, experienced makers immediately focused on material choice rather than printer settings. Multiple users noted that TPU could produce a good-looking 3D printed airless basketball, but PEBA was often responsible for the highest bounce performance.
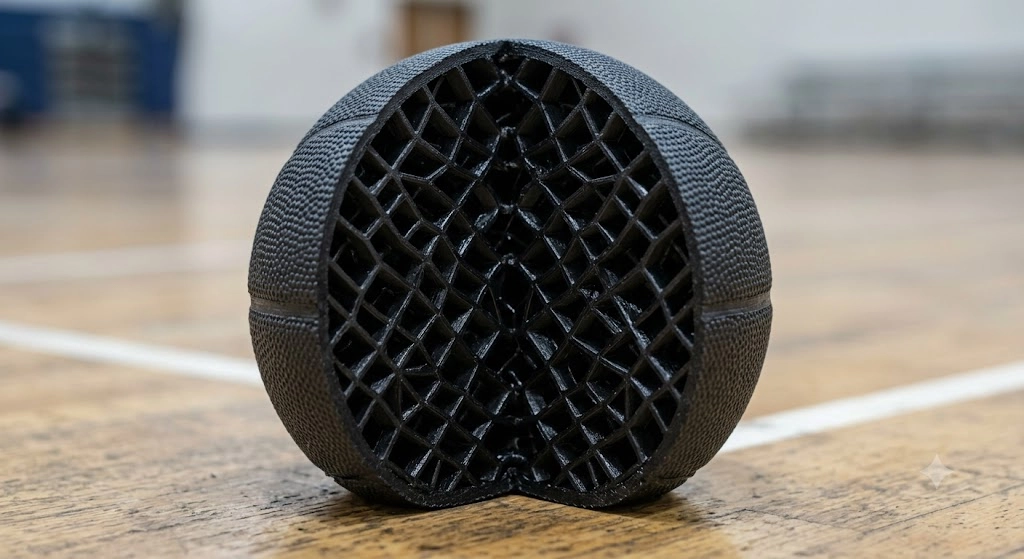
How Airless Basketballs Store Energy
Unlike a traditional basketball, there is no pressurized air chamber inside a 3D print airless basketball.
Instead, the internal lattice acts like thousands of tiny springs.
When the ball impacts the floor:
- The lattice compresses.
- Energy is stored throughout the structure.
- The material deforms temporarily.
- The lattice rebounds.
- Energy is released back into the ball.
The efficiency of that cycle determines whether your 3D printed airless basketball actually feels playable.
A poorly designed lattice may absorb energy but fail to release it efficiently. That's why two balls printed from the same airless basketball material can behave completely differently.
The best-performing designs use carefully tuned lattice geometries that distribute impact forces evenly across the structure rather than concentrating them in a few areas.
Why Some Airless Basketballs Feel Dead
If you've watched videos of a 3D printed airless basketball bouncing like a real ball and then printed your own version only to see it barely rebound, one of these issues is usually responsible.
Poor lattice design
Many free models look impressive but were never optimized for energy return. Dense or irregular lattices often absorb impact instead of returning it.
Wrong material
Material selection matters more than many people realize. TPU is durable and forgiving, but not every TPU basketball delivers strong rebound. Some grades absorb too much impact energy. PEBA generally returns more energy and creates a more realistic bounce.
Incorrect wall thickness
More material does not always mean better performance.
Overbuilt lattice structures add weight and stiffness. That extra mass often reduces bounce efficiency and makes the ball feel sluggish during dribbling.
This is why experienced makers spend as much time optimizing airless basketball material selection and wall thickness as they do adjusting printer settings.
What STL Should You Use for an Airless Basketball?
If you're learning how to 3D print airless basketball designs for the first time, start with a proven STL that's already been tested by the maker community.
Creating the lattice is actually harder than printing it.
A good STL can save dozens of hours of failed printing, material waste, and frustration.
What Makes a Good Airless Basketball STL?
Not every model marketed as a 3D printed airless basketball is worth printing.
Look for designs with:
- Single-piece printing
- Uniform lattice distribution
- Consistent wall thickness
- Support-friendly geometry
- Proven bounce testing
Single-piece models eliminate assembly issues and ensure the lattice behaves as intended.
Uniform lattice structures are equally important. Areas with dramatically different cell sizes often create inconsistent rebound characteristics that make the ball feel unpredictable.
Support-friendly geometry matters too. Many airless basketball designs take 48-80 hours to print. Discovering support removal damage after three days of printing is not a fun experience.
The best airless basketball 3D print files are usually those that have already been tested by hundreds of makers rather than experimental designs uploaded without real-world validation.
Should You Design Your Own Basketball?
You can, but it isn't the easiest route.
Most successful custom 3D printed airless basketball projects start with advanced CAD and lattice-generation software.
Common options include Fusion 360, SolidWorks and nTopology
Fusion 360 works well for beginners exploring lattice structures.
SolidWorks provides stronger engineering tools and simulation capabilities.
nTopology is where things get serious. Many advanced lattice designs used in sports equipment development rely on software like this because it allows highly controlled cellular structures that would be difficult to build manually.
Unless you're specifically researching airless basketball material behavior or sports-product development, starting from a community-tested STL is usually smarter.
Maker communities have already done much of the trial-and-error work. Platforms such as MakeItLab and other established maker repositories contain tested models that provide a much better starting point than designing from scratch.
Should You Use TPU or PEBA?
For most people learning how to 3D print airless basketball projects, TPU is the easiest and most affordable option. If your goal is maximum bounce performance, PEBA is usually the better choice.
The debate between TPU basketball designs and PEBA basketball designs comes down to one thing:
Energy return.
TPU is excellent at surviving impacts.
PEBA is excellent at returning energy after impacts.
That's why so many high-performance airless basketball material discussions eventually focus on PEBA.
TPU vs PEBA Comparison
| Property | TPU | PEBA |
|---|---|---|
| Ease of Printing | Excellent | Moderate |
| Bounce Potential | Good | Excellent |
| Energy Return | Medium | Very High |
| Durability | Excellent | Good |
| Cost | Lower | Higher |
| Availability | High | Medium |
| Prototype Testing | Excellent | Good |
| Competition-Level Bounce | Limited | Best Option |
When the viral airless basketball videos first surfaced on social media, experienced makers in the Reddit 3D printing community immediately analyzed the bounce. Many concluded that standard TPU couldn't achieve such a high rebound, pointing instead toward advanced PEBA basketball construction.
That doesn't mean TPU is bad.
A well-designed TPU basketball can still produce impressive results and is usually the smartest starting point for first-time builders. TPU is easier to source, easier to tune, and more forgiving during long prints.
PEBA simply raises the ceiling for what a 3D printed airless basketball can achieve.
Here’s a detailed 3D printed airless basketball material comparison guide on TPU vs PEBA.
Recommended TPU for First-Time Airless Basketball Projects
If this is your first airless basketball, TPU is usually the safest choice because it is easier to print and more tolerant of design mistakes.
JLC3DP TPU (95A)
Features:
- Excellent tear resistance
- Excellent abrasion resistance
- Multiple color options
- Suitable for lattice structures
Applications:
- Basketball prototypes
- Bounce testing
- Sports equipment development
Pro-Tip on Scaling: A standard 95A TPU filament can feel incredibly stiff if printed at full 1:1 scale with thick walls. To achieve a realistic bounce with 95A TPU, experienced makers recommend printing the basketball at a reduced scale (e.g., a mini mini-ball) or utilizing an ultra-thin, optimized single-wall lattice design.
Because a full-scale basketball print can easily hog your machine for an entire weekend, outsourcing your first prototype can save you massive amounts of time and potential headache.
You can upload your STL and get an instant TPU 3D printing quote from JLC3DP and test your airless basketball design without tying up your printer for an entire weekend.
- 95A flexible material with strong tear resistance and durability
- Designed for repeated bending, impact absorption, and daily use
Why Do Most TPU Airless Basketballs Fail the Bounce Test?
Most TPU basketball designs fail because TPU absorbs a significant amount of impact energy instead of returning it efficiently.
That's actually why TPU is such a popular engineering material. It's durable, flexible, abrasion resistant, and forgiving. The downside is that those same characteristics can work against you when you're trying to create a 3D printed airless basketball that feels like a real basketball.
Many makers successfully 3D print airless basketball prototypes with TPU, only to discover that the ball survives impacts perfectly but feels sluggish during dribbling. The energy goes into the material and never fully comes back out.
Common TPU Bounce Problems
The first issue is simple energy absorption.
When a TPU basketball hits the ground, part of the impact energy gets converted into heat within the material itself. Instead of returning that energy to the bounce, TPU dissipates it. That's why many early airless basketball 3D print projects look impressive but fail practical bounce tests.
Excessive wall thickness creates another problem.
Many people assume stronger equals better and increase wall thickness throughout the lattice. The result is usually the opposite. Thick lattice members add weight and stiffness while reducing the efficiency of energy return. A heavy 3D printed airless basketball often feels dead compared to a lighter design using the same airless basketball material.
The third issue is infill strategy.
Traditional infill patterns that work for normal prints rarely work well for an airless basketball 3D print. Gyroid, cubic, and standard infill structures were not designed specifically for rebound performance. Airless basketballs depend on engineered lattices that compress and recover predictably across the entire ball.
How to Improve TPU Bounce
The good news is that TPU can still produce a surprisingly good 3D printed airless basketball when the design is optimized correctly.
The biggest improvement usually comes from lattice optimization.
Instead of making the lattice thicker, focus on improving geometry. Better cell design often produces larger bounce gains than changing to a different airless basketball material.
Reducing mass also helps.
Many successful makers trim unnecessary material from non-critical regions of the lattice. A lighter TPU basketball requires less energy to rebound and generally feels more responsive.
Wall tuning matters as well.
Small wall-thickness changes can dramatically affect rebound characteristics. Several recent maker experiments showed that reducing wall thickness often improved bounce more than increasing infill density.
This lines up closely with the Reddit discussion where experienced users repeatedly pointed out that material alone wasn't the answer. The best-performing 3D printed airless basketball projects combined good material selection with carefully optimized lattice structures.
Is PEBA the Secret to a Realistic Bounce?
PEBA currently offers some of the best rebound performance available for an airless basketball 3D print and has become the preferred choice among many serious builders.
If you've spent time researching how to 3D print airless basketball projects, you've probably noticed a pattern. The most realistic bounce demonstrations almost always lead to the same question:
"What material is that?"
More often than not, the answer is PEBA.
PEBA materials have been reported to achieve energy return values approaching 78%, putting them much closer to the behavior of performance athletic materials than typical flexible filaments.
That's why many advanced PEBA basketball projects bounce noticeably higher than comparable TPU versions.
Why PEBA Performs Better
The biggest advantage of PEBA basketball designs is resilience.
PEBA deforms under impact and then recovers extremely quickly. That rapid recovery allows more energy to return to the bounce rather than being lost internally.
Recovery speed is another major factor.
A TPU basketball may compress effectively, but PEBA generally springs back faster. During repeated dribbling, that faster recovery creates a much more natural basketball feel.
PEBA is also inherently less dense than TPU. For the same lattice geometry and ball size, a PEBA basketball will typically weigh slightly less than an equivalent TPU version. Lower mass means less energy is required to reverse the ball’s direction during impact, giving PEBA an additional advantage in bounce performance.
Then there's energy return.
This is where PEBA really separates itself from most other airless basketball material options. More of the impact energy goes back into upward motion rather than being absorbed by the material structure.
That's why so many experienced makers now view PEBA as the benchmark material for high-performance 3D printed airless basketball projects.
What Makes PEBA Difficult to Print at Home?
Despite its unparalleled performance, PEBA is notoriously finicky for consumer-grade FDM setups:Cons
- Cost Barriers: At nearly triple the price of standard TPU, a failed full-scale print can easily flush $100 down the drain.
- Extreme Hydroscopicity: PEBA acts like a sponge for atmospheric moisture. If it isn’t dried continuously in an active heated drybox during the print, it will sputter, string, and lose its interlayer bonding strength entirely.
- Warping & Bed Adhesion: PEBA behaves more like nylon than TPU when it comes to thermal shrinkage, requiring fine-tuned bed temperatures and enclosure management.
That extra complexity is why many builders start with a TPU basketball prototype ordered from a professional 3D printing service before committing to a full PEBA basketball build.
JLC3DP PEBA Plastic for High-Bounce Airless Basketball Development
If your goal is maximum rebound rather than easy printing, PEBA is often the preferred material.
Suitable for:
- Airless basketball development
- Sports equipment R&D
- Energy-return lattice structures
- Functional bounce testing
A full-size 3D printed airless basketball can take 48-80 hours to produce. For PEBA projects, failed prints become expensive very quickly. Using a professional service for early validation can save both material and machine time while you refine the design.
Request a PEBA prototype quote from JLC3DP and test high-energy-return lattice designs before committing to full production.
- combines ultra-low density with exceptional elasticity
- ideal for airless balls, midsoles, and sports products
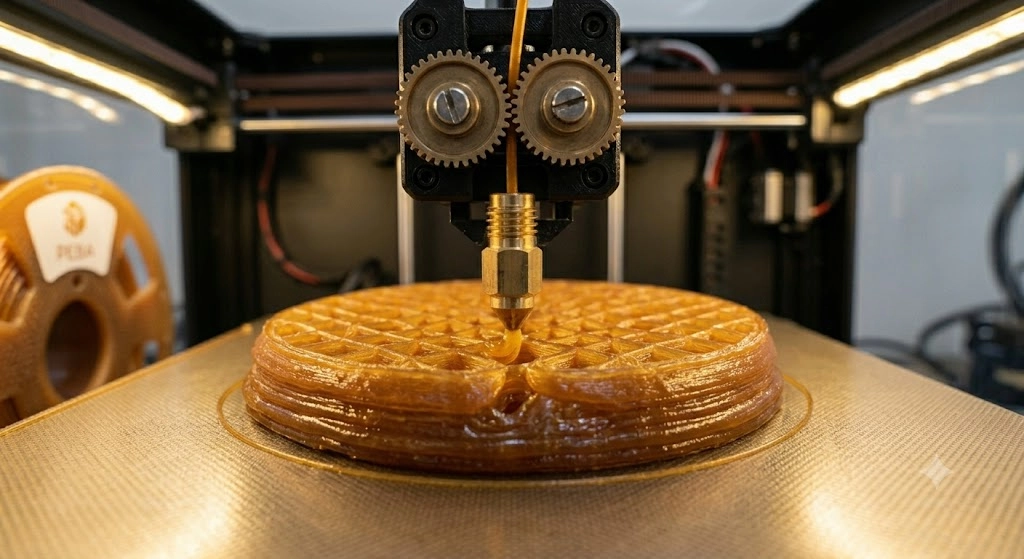
What Print Settings Work Best?
Most successful 3D printed airless basketball projects use larger nozzles, relatively slow print speeds, dry filament, and carefully optimized support settings.
The biggest mistake beginners make when learning how to 3D print airless basketball models is treating them like ordinary flexible prints.
These parts are large, mechanically demanding, and often run continuously for several days.
TPU Print Settings
For a TPU basketball, a 0.6 mm nozzle is usually the sweet spot.
The larger nozzle reduces print time while maintaining strong layer bonding across lattice structures.
Most makers run TPU slowly, often between 20-40 mm/s depending on printer capability. Faster speeds increase the risk of inconsistent extrusion and poor layer quality.
Dry filament is non-negotiable.
Moisture in TPU creates bubbles, inconsistent extrusion, and weaker lattice members. Before attempting a large airless basketball 3D print, drying TPU is usually worth the extra preparation time.
PEBA Print Settings
PEBA is even more sensitive to moisture than TPU.
Many successful PEBA basketball builders dry material thoroughly before every major print.
Support tuning becomes important because support removal damage can ruin a print that took several days to complete. The best strategy is usually minimizing supports through model orientation whenever possible.
Temperature optimization matters as well.
Community testing has shown that small temperature changes can noticeably affect layer adhesion and overall performance in PEBA basketball designs. Most makers spend time dialing in test pieces before committing to a full-size ball.
The builders producing the most realistic 3D printed airless basketball results rarely succeed on their first attempt. Most go through several rounds of material tuning before reaching their target bounce performance.
How Long Does It Take & How Much Filament is Needed?
A full-size 3D printed airless basketball typically takes between 30 and 80 hours to print depending on lattice complexity, nozzle size, and print settings.
This surprises many people researching how to 3D print airless basketball designs for the first time.
The geometry may look simple from the outside, but the internal lattice structure contains thousands of interconnected features that dramatically increase print time.
A regulation-size airless basketball 3D print naturally requires more material and more toolpaths than a scaled-down prototype.
Quick Reference Resource Table
| Material Type | Average Filament Mass | Average Print Time (0.4mm Nozzle) | Optimized Print Time (0.6mm Nozzle) |
|---|---|---|---|
| TPU (95A / 85A) | 800g – 1.5kg | 60 – 85 Hours | 28 – 40 Hours |
| PEBA | 700g – 1.4kg | 70 – 90 Hours | 35 – 45 Hours |
Trouble-Shooting: Why Most Airless Basketball Prints Fail
Most failed projects happen because builders choose the wrong material or expect bounce performance from geometry that was never designed to return energy.
One thing becomes obvious after looking through dozens of airless basketball 3D print projects: successful builds are rarely first attempts.
The most common failure is assuming that any flexible filament can become a high-performance 3D printed airless basketball. It can't. Material matters far more than many beginners expect.
Another common mistake is chasing stiffness. Many failed TPU basketball designs use thick lattice walls because the builder wants durability. The ball survives impacts but loses bounce performance.
Support removal causes problems too. After waiting 50 or 60 hours for a print to finish, damaging the lattice during cleanup is painful. Small support settings deserve far more attention than most people give them.
The biggest lesson is that bounce comes from the entire system working together. The STL, the airless basketball material, the wall thickness, and the print settings all contribute. Changing only one variable rarely transforms a mediocre design into a great one.
The Fastest Path to Build a Functional Airless Basketball
Start with a proven STL, build your first 3D printed airless basketball using TPU, evaluate bounce performance, then move to PEBA if you need higher energy return.
Trying to optimize everything at once usually leads to wasted material and lost time.
A proven workflow looks like this:
- Download a community-tested STL.
- Print a TPU prototype.
- Evaluate bounce behavior.
- Modify lattice parameters if necessary.
- Upgrade to a PEBA basketball design when you're ready for maximum performance.
That's the shortest path to learning how to 3D print airless basketball projects that actually perform well instead of simply looking impressive on a shelf.
FAQ about Printing an Airless Basketball
Q: Can you really 3D print a basketball that bounces?
Yes. A properly designed 3D printed airless basketball using the right lattice structure and material can achieve surprisingly realistic bounce performance.
Q: What filament is best for a 3D printed basketball?
For beginners, TPU is usually best. For maximum performance, PEBA basketball designs generally deliver higher energy return.
Q: Why doesn't my TPU basketball bounce?
Most TPU basketball failures are caused by energy absorption, excessive wall thickness, poor lattice geometry, or incorrect print settings.
Keep Learning
3MF VS STL: Which File Format Is Better for 3D Printing?
In the additive manufacturing industry, the STL format has served as the de facto standard for decades. However, the rapid evolution of modern 3D printing has highlighted its technical limitations. Consequently, the 3MF format—backed by an industry consortium including Microsoft, HP, and Ultimaker—has emerged as a robust, next-generation alternative. When exporting a 3D model from CAD or preparing it within a slicer, understanding the technical nuances of 3MF VS STL is critical. This article provides ......
How to 3D Print a Perfect Airless Basketball Without Failing
To figure out how to 3D print an airless basketball that actually bounces, you need four things: A proven airless basketball STL A bounce-optimized material (TPU or PEBA) Correct print settings A lattice structure designed for energy return Most failed prints are not caused by the printer itself. They fail because the material or structure cannot efficiently return energy during impact. This guide breaks down the exact community-tested STL files, the ultimate showdown between TPU and PEBA materials, a......
How to 3D Print Large Objects Beyond Your Printer’s Size
Every maker hits this moment. You design something ambitious. A full-size prop. A car interior panel. A furniture joint. A mold that actually fits the real part. You hit “slice”… and then reality shows up. The model is bigger than your build plate. That’s the big challenge of going big. 3D printing large objects sounds simple until you try it. Your printer doesn’t suddenly grow just because your idea did. And scaling a model isn’t the same as successfully 3D printing at large scale. Once parts get big......
How to prevent 3d printing warping problems
3d printing warping is one of the most common problems faced by 3d printing enthusiasts. Especially when printing larger models, the printed parts initially adhere to the print bed, but then the edges of the prints lift off the print bed and curl, causing the model to deform and waste material. The main reason for warping is that plastic materials cool and shrink when printed, which causes deformation. This article will analyze the causes of warping and use suggestions to prevent 3d printing warping t......
Getting Smoother Curves: Understanding Non-Planar 3D Printing
Image via: Pexels by Jakub Zerdzicki Visible layer lines commonly known as stair-step effect can be an issue on your curved or sloped surfaces 3D printed parts. This common challenge in additive manufacturing affects both the look and sometimes the strength of your components. Non planar 3D printing is a developing technique that directly addresses this problem by changing how layers are applied. This article will help you understand the following about non planar 3D printing: ● What it means and how ......
Can You 3D Print a Key? Legal Risks, Materials & 3D Printing Tips
(Freepik) Thinking of a fun and functional project? Or afraid of losing your keys and wondering if your 3D printer can save the day? You’re not alone. 3D printing keys has become a hot topic in maker forums and locksmith circles alike. Whether it’s a house key, a car key fob shell, or a custom-designed lock, the idea of duplicating or prototyping a key using just plastic filament and a CAD file is incredibly tempting. But the problem is: printing keys isn’t always legal, it doesn’t always work, and de......