Can You 3D Print Metal at Home? Costs & Methods
16 min
- The Dream of Desktop Metal AM
- How Home Metal 3D Printing Actually Works
- How to 3D Print Metal at Home? The 3 Main Methods
- Can Standard FDM Printers Print Metal Filament?
- Why Home Metal Printing Is Harder Than It Looks
- DIY vs. Professional Metal Printing Service (JLC3DP)
- When Does It Make Sense to Print Metal at Home?
- When to Use a Metal 3D Printing Service
- DIY vs Industrial Metal Printing Cost
- FAQ about 3D Metal Printing at Home
- Conclusion: Choose Efficiency Over Complexity
Key Takeaways
The Dream of Desktop Metal AM
The appeal is obvious that metal parts are stronger, more heat resistant, and more durable than anything plastic can produce. A functional bracket that survives under-hood automotive temperatures, a titanium component for a drone, a stainless steel tool that actually holds up in use, these are real engineering requirements that plastic printing can't meet.
So the question many engineers and makers eventually ask is simple: can you 3D print metal at home?
The short answer is yes, technically. But not in the way most people imagine.
The longer answer is that 3D printing metal at home the way most people imagine— loading the file, press print, receive a metal par— doesn't exist yet in any home-viable form. What does exist is a compromise-heavy, multi-stage process that requires more space, more equipment, more expertise, and more money than most people anticipate before they start researching it seriously.
Here's what that actually looks like in 2026.
How Home Metal 3D Printing Actually Works
(Source: Reddit)
The only metal 3D printing method that approaches home viability in 2026 is metal FDM, sometimes called FFF or bound metal deposition.
Note
Most home-accessible workflows are technically indirect metal additive manufacturing rather than direct laser metal fusion. This fundamental distinction is why the "print" button is only the beginning of the journey.
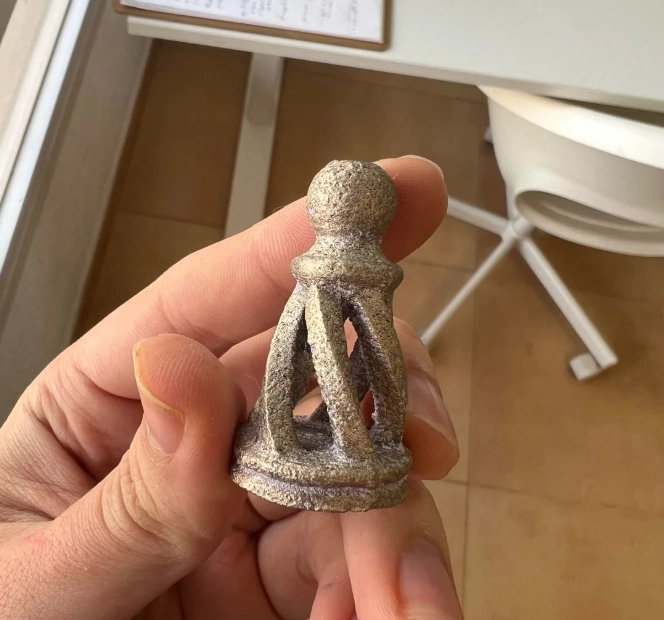
Machines like the Markforged Metal X, Desktop Metal Studio System, and a handful of newer entrants use metal powder suspended in a polymer binder, extruded like a standard FDM filament, to build a "green part" that looks and feels like a plastic print.
That green part is not a metal part. It's a shaped binder matrix with metal powder inside it.
To become a metal part, it goes through two more stages:
- Debinding
- Sintering
Three stages, three pieces of equipment, significant process knowledge required at each step. That's what 3D printing metal at home actually means in practice.
How to 3D Print Metal at Home? The 3 Main Methods
3D printing metal at home has become increasingly accessible for makers, engineers, and small workshops, although the process is still far more complex than standard plastic FDM printing. Today, most home-accessible workflows fall into three practical categories, each balancing cost, workflow complexity, and final part performance differently.
1.Metal Filament (FDM/FFF) 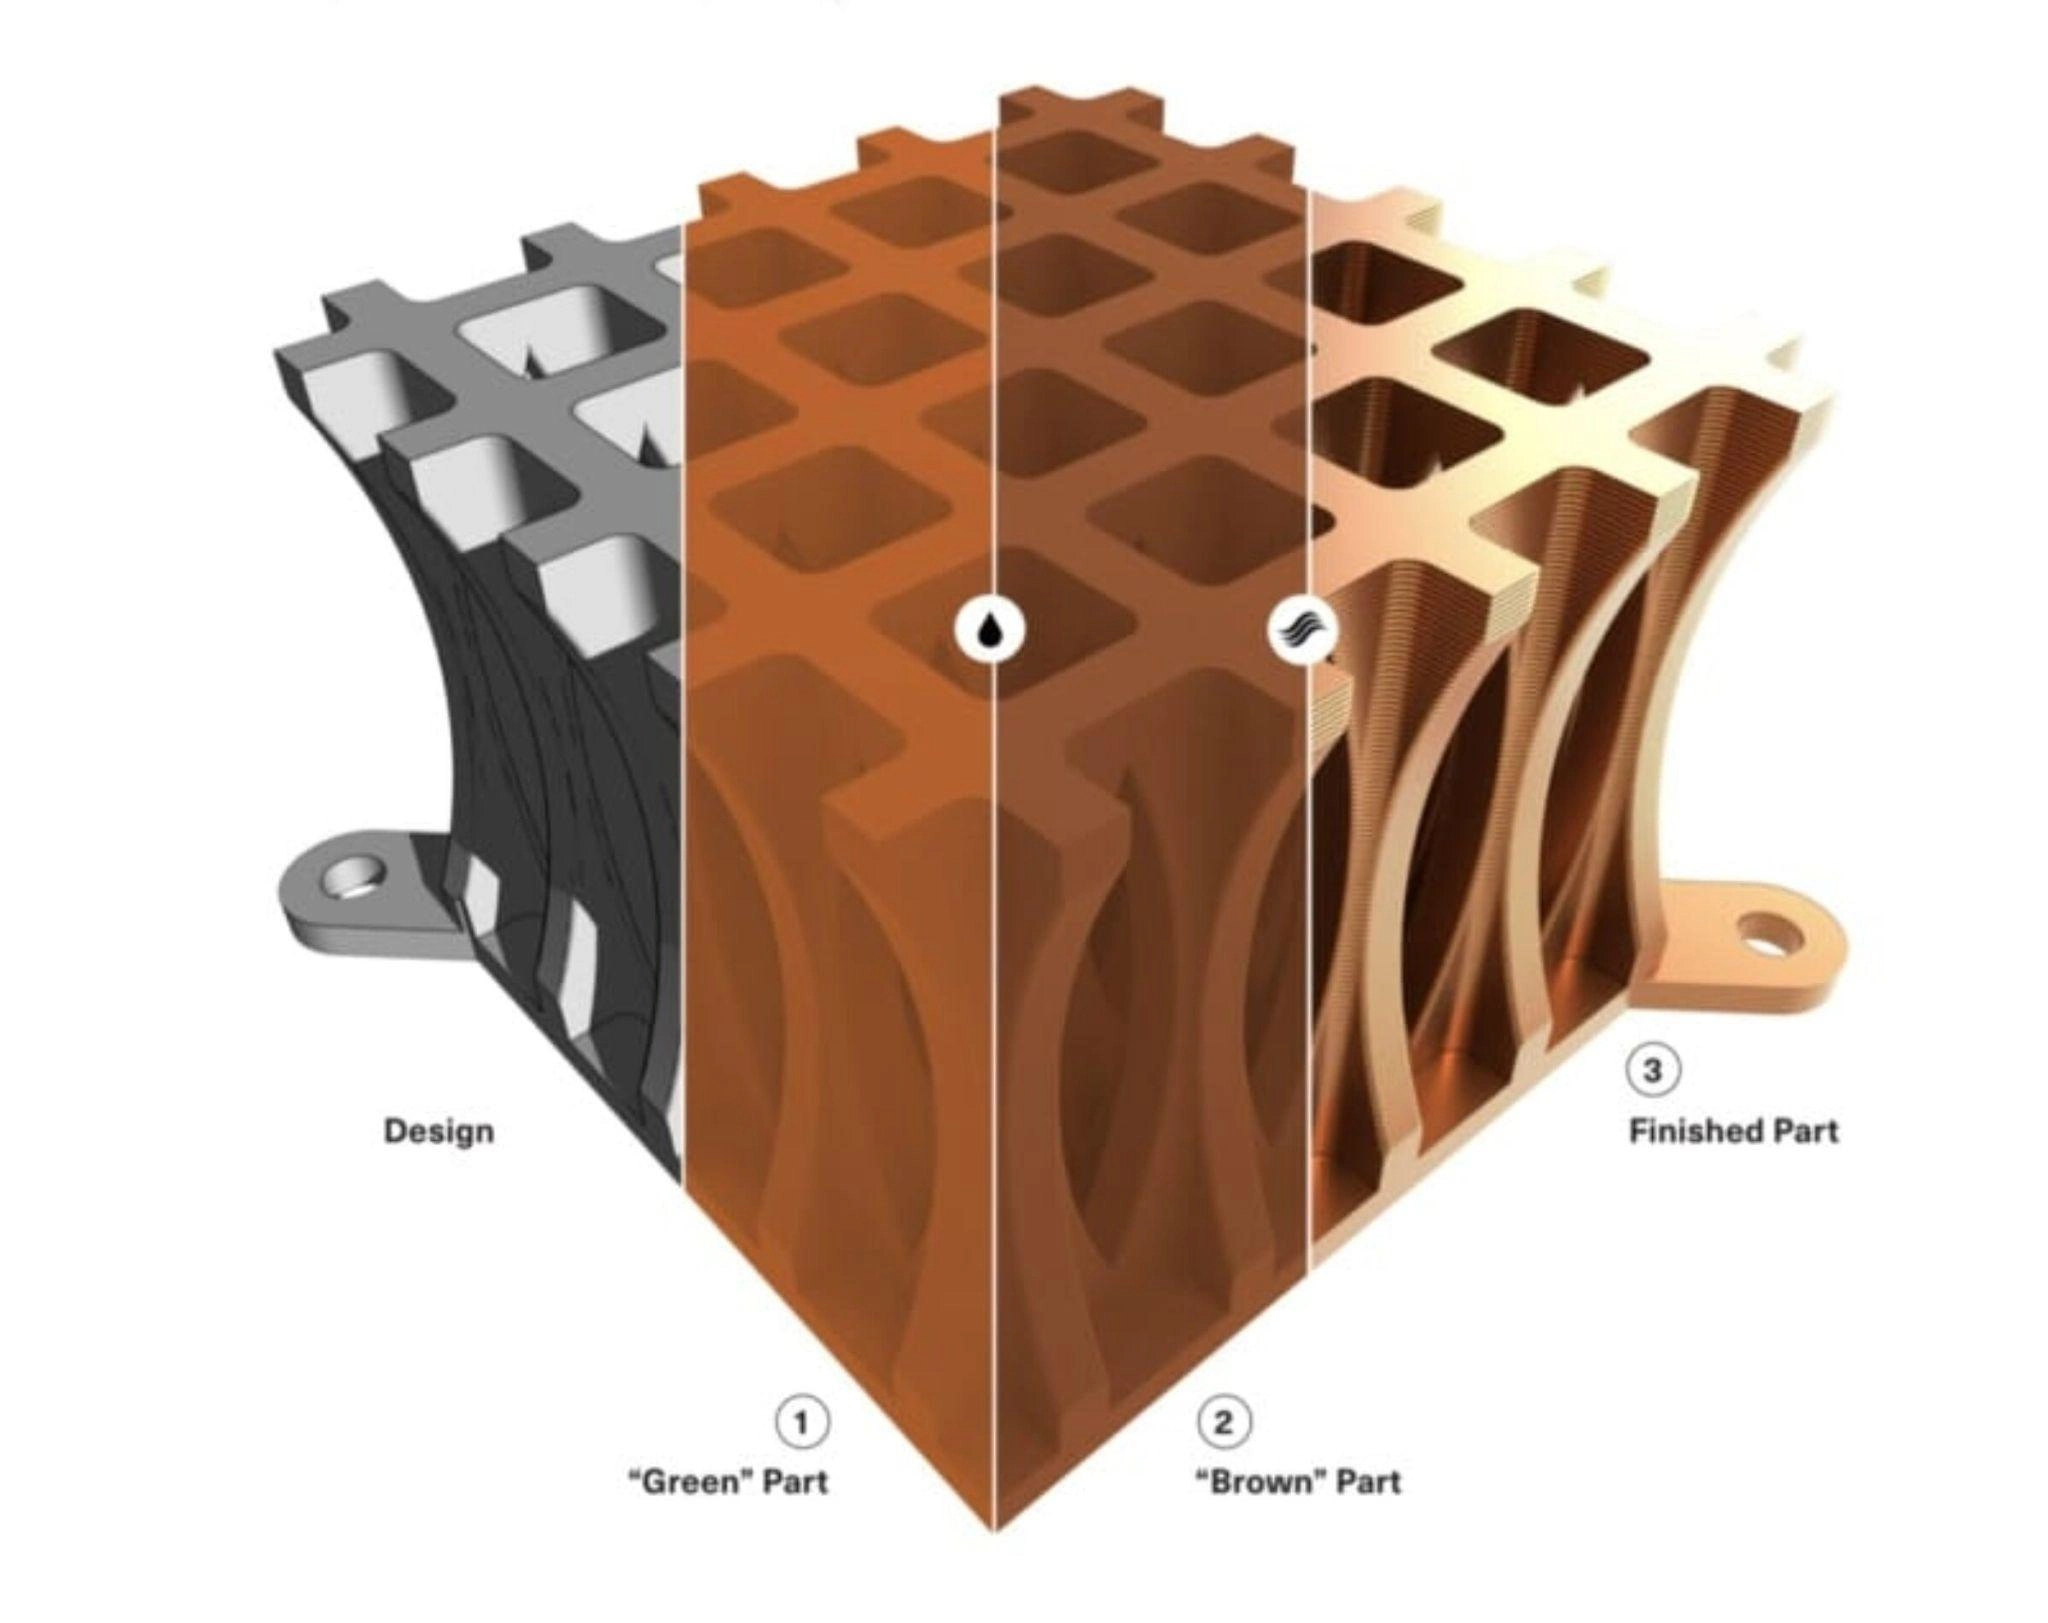
(Source: Markforged)
How can you 3D print metal at home on a budget? This is currently the most practical way.
This method uses metal-filled filament, typically stainless steel powder mixed with a polymer binder, printed on modified FDM/FFF machines. Popular materials include BASF Ultrafuse 316L and Virtual Foundry Filament. Users commonly run these materials on upgraded Prusa, Bambu Lab, or Ender systems equipped with hardened steel nozzles.
The workflow is relatively straightforward:
- print the part
- debind the binder material
- sinter the part in a high-temperature furnace
After sintering, parts typically shrink around 15–20%, depending on geometry and material loading. Final density and mechanical properties vary based on furnace quality and process consistency.
Typical setup requirements:
- FDM printer with hardened nozzle
- metal filament ($250–475/kg for 316L)
- access to debinding and sintering services or equipment
This approach works well for:
- stainless steel prototypes
- brackets and fixtures
- low-volume tooling
- hobby and engineering experimentation
For users exploring metal 3D printer for home workflows without investing in industrial systems, metal filament remains the most practical starting point.
2.Metal Clay/Resin – Experimental and Artistic Routes
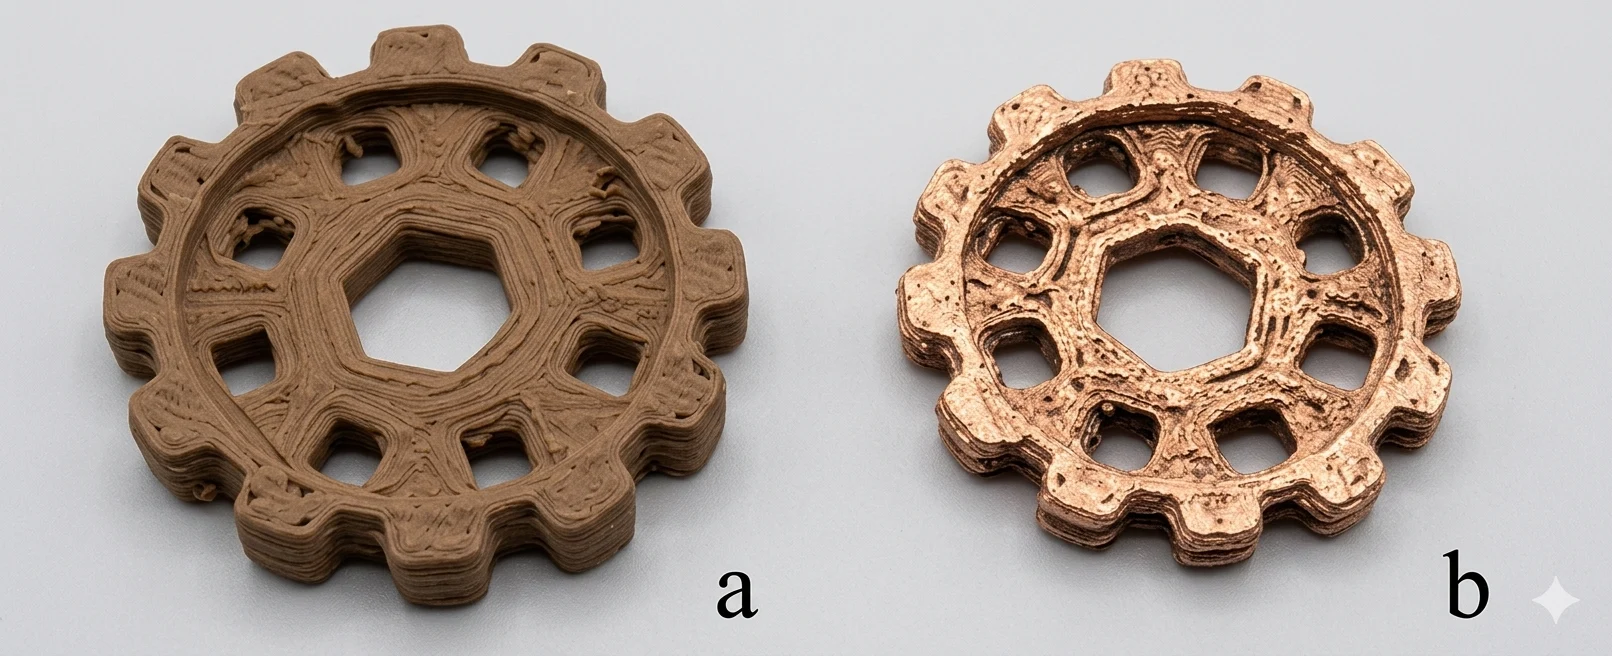
(Source:ResearchGate)
For more artistic, jewelry-scale, or highly experimental work, metal clay or paste-based approaches offer another path to how to 3d print metal at home.
Instead of filament, the process uses metal powder mixed with binders or resin carriers, extruded or cured layer by layer before firing in a kiln or furnace. Bronze, copper, and stainless-based materials are the most common.
Compared to filament systems, this workflow offers:
- lower raw material costs
- more freedom for artistic shapes
- compatibility with DIY paste extruders or ceramic printers
However, consistency is harder to maintain, especially for larger or load-bearing parts. Shrinkage, cracking, and deformation are more common without careful thermal control.
These setups are typically best suited for:
- jewelry
- decorative metal prints
- small artistic objects
- experimental homemade metal 3d printer projects
For makers who already own kilns or ceramic equipment, this can be a lower-cost way to experiment with metal printing at home.
3.Hybrid Prosumer Systems – Desktop Metal Workflows for Small Workshops
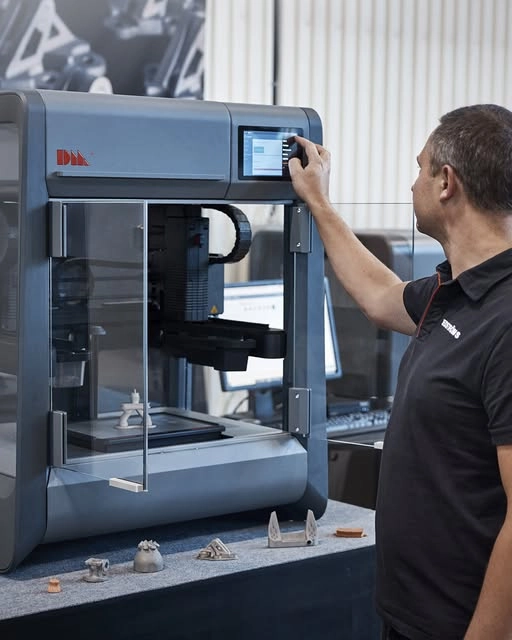
(Source: Facebook)
Hybrid prosumer systems sit between hobbyist FDM workflows and industrial metal additive manufacturing (such as binder jetting). These platforms are designed for engineers, studios, and small workshops looking for more consistent results from a personal metal 3d printer setup.
Many of these systems combine:
- bound metal extrusion
- binder jetting-inspired workflows
- dedicated debinding and sintering stations
Compared to basic FDM metal printing, they typically offer:
- better dimensional consistency
- improved surface quality
- higher repeatability
- support for small-batch production
The tradeoff is cost. A complete metal 3d printer at home workflow can range from roughly $10,000 to well over $100,000 depending on the hardware, furnace system, and materials used.
These 3d metal printer for home use systems are commonly used for:
- functional prototypes
- engineering validation parts
- low-volume production
- stainless steel and tool-grade components
While far smaller than industrial SLM systems, they still require dedicated space, ventilation, and post-processing equipment, making them more suitable for garages or workshops than standard desktop environments.
Can Standard FDM Printers Print Metal Filament?
Yes, many standard FDM printers can print metal-filled filament, especially stainless steel composite materials designed for bound metal workflows. However, these materials are highly abrasive and require upgraded hardware for reliable printing.
Most experimenting with 3d printing metal at home start with modified consumer FDM printers rather than dedicated industrial systems.
Bambu Lab P1P / Bambu Lab X1 Carbon
These are currently the fastest and most stable hobbyist platforms for printing metal-filled filaments. Their closed-loop control and high acceleration help maintain consistent extrusion, which matters when dealing with abrasive composite filaments like stainless-filled PLA or dedicated bound metal filaments.
However, they are not plug-and-play for this use case. You need hardened steel or tungsten carbide nozzles to handle abrasion. More importantly, dimensional accuracy at this stage is misleading. A printed “316L part” is not actually 316L yet. It is a polymer-metal composite that will shrink significantly during sintering, typically in the range of 15–20%, depending on the system.
Snapmaker J1S
The J1S stands out because of its independent dual extrusion system. This is useful when printing green parts with complex geometries that require soluble or breakaway supports. Support removal at the green stage is delicate. The part is fragile, and any stress can introduce defects that only show up after sintering.
That said, dual extrusion does not solve the real constraint. After printing, the part still requires controlled debinding, where the binder is removed without collapsing the geometry, followed by sintering in a controlled atmosphere furnace. Without that backend, the printed part never becomes dense metal.
Ender-5 S1
This is the typical entry point. It can be adapted for metal-filled filament with upgrades, mainly hardened nozzles and improved extrusion stability. It allows experimentation with the soft phase of the process, where you are shaping the green body.
But this is where most setups fail. The printer can produce a shape, but it cannot control the downstream physics. During sintering, the part undergoes shrinkage, density changes, and potential distortion. Without calibrated shrink factors and proper support during firing, dimensional accuracy drifts beyond usable tolerances.
Why Home Metal Printing Is Harder Than It Looks
While metal 3D printing at home is technically possible, the biggest challenges appear after the printing stage. Most workflows can produce a “green part” relatively easily, but turning it into functional metal requires tightly controlled post-processing that is difficult to replicate in a typical home environment.
Sintering Is the Real Bottleneck
The most critical limitation in home metal 3D printing is sintering. This is the stage where the printed green part is transformed into a dense metal component through high-temperature processing.
Unlike standard home heating equipment, proper sintering requires:
- dedicated high-temperature furnaces (often exceeding 1300°C for stainless steels like 316L)
- carefully controlled thermal profiles with gradual ramp-up and cooling stages
- stable atmosphere control using inert or reducing gases such as argon or hydrogen
Even small deviations in temperature or heating rate can affect part integrity. Rapid heating may cause internal defects, while insufficient control can result in incomplete densification.
Another major challenge is dimensional stability. Parts do not retain their printed size. Instead, they undergo significant shrinkage during sintering, which varies depending on geometry, wall thickness, and material distribution. Without calibrated compensation models, final dimensions can be difficult to predict consistently.
Safety & Ventilation Challenges
Home metal printing also introduces safety considerations that go beyond standard desktop 3D printing.
During debinding and thermal processing, materials can release:
- volatile organic compounds (VOC fumes)
- fine particulate residues from binders
- potentially hazardous off-gassing depending on material type
High-temperature furnaces also introduce additional risks, including fire hazards and burn risks from improper handling or uncontrolled thermal cycles.
Proper ventilation is essential, but many home or garage setups lack industrial-grade extraction systems. Without adequate airflow management, fumes and particles can accumulate in enclosed spaces.
Metal powders and composite residues can also contribute to fine dust exposure during handling, requiring careful cleanup and containment practices.
Why “Desktop Metal” Still Needs a Workshop
Actually,The "Desktop Metal" is a marketing stretch. Desktop Metal Isn’t truly Desktop.Despite the “desktop” label used in marketing, most metal 3D printing workflows require infrastructure closer to a small workshop than a typical home office.
Key requirements often include:
- gas supply systems for inert or reducing atmospheres
- high-power electrical infrastructure for industrial furnaces
- temperature-controlled and ventilated operating spaces
- safe storage and handling areas for materials and equipment
In practice, the footprint extends far beyond the printer itself. Even compact systems typically rely on auxiliary equipment such as debinding units and sintering furnaces, which occupy significant space and require proper installation conditions.
As a result, while the printer may sit on a desk, the full metal 3D printing workflow behaves more like a scaled-down manufacturing environment than a consumer desktop device.
In practice, this is why industrial metal additive manufacturing remains the more established and reliable solution for most functional applications.
Processes like SLM and Binder Jetting offer controlled environments, consistent density, and predictable shrinkage, which are difficult to achieve in home setups.
For production-grade metal parts, industrial workflows remain the standard approach.
JLC3DP provides access to these processes, including SLM and Binder Jetting for materials such as 316L stainless steel and TC4 titanium.
DIY vs. Professional Metal Printing Service (JLC3DP)
Once you compare the full process chain, the gap is not subtle. It’s structural.
| Factor | DIY FDM (Metal Filament) | JLC3DP Industrial Process |
|---|---|---|
| Process Type | Extrusion of metal-filled filament | SLM (laser melting) + Binder Jetting |
| Material State | Green part (binder-heavy) | Fully dense or near-dense metal |
| Density | Highly variable, often porous | 99%+ density (SLM) |
| Accuracy | Shrinkage guesswork | Controlled, calibrated shrink compensation |
| Surface Integrity | Dependent on sintering success | Consistent, production-grade finish |
| Materials | Limited to filament blends | 316L, TC4 (SLM), BJ-316L (Binder Jetting) |
| Safety | High risk (fumes, fire, atmosphere) | Industrial controlled environment |
The quality gap shows up immediately in the final part.
Home-sintered parts often contain internal porosity because the densification process is incomplete or inconsistent. That affects strength, fatigue life, and sealing performance. In contrast, SLM uses a laser to fully melt powder, producing near-wrought density. Binder jetting systems used industrially for BJ-316L apply precise debinding and sintering cycles that achieve consistent mechanical properties.
Material access is another hard limit. At home, you are restricted to what can be extruded as filament. Industrial systems handle real engineering alloys. JLC3DP offers SLM with 316L stainless steel and TC4 titanium alloy, along with binder jetting for BJ-316L. These are not just different materials. They represent entirely different process capabilities.
When evaluating BJ vs SLM, engineers must weigh the extreme mechanical strength of SLM against the geometric freedom and cost-effectiveness of Binder Jetting.
If your goal is functional parts, especially for 3d printing of stainless steel, the decision is less about equipment cost and more about process control. The printer gets your shape. The service gets you performance.
When Does It Make Sense to Print Metal at Home?
There is a place for DIY metal printing. It just needs to be framed correctly.
If your goal is learning how the process behaves, understanding shrinkage, or experimenting with geometry before committing to a real production route, printing green parts at home makes sense. It is useful for hobby projects where failure is acceptable, for testing how features deform during sintering, or for producing small decorative parts where mechanical performance is not critical.
Where it breaks down is when the part is expected to function like real metal.
Once load enters the picture, the limitations show up fast. Internal porosity, inconsistent density, and uncontrolled shrinkage make it unreliable for load-bearing parts. The same applies to production components, where repeatability matters more than one successful print. High-precision engineering parts fail for a different reason. The process cannot hold tolerance after sintering without calibrated compensation, and home setups do not provide that level of control.
Home printing is useful for learning and rough prototyping. It is not a substitute for engineered metal parts.
When to Use a Metal 3D Printing Service
The decision shifts the moment performance becomes a requirement.
If the part needs to carry load, maintain dimensional accuracy, or behave predictably across multiple builds, the process has to be controlled end-to-end. That means moving beyond green parts into fully densified metal produced through industrial systems.
This is where processes like Selective Laser Melting (SLM) and Binder Jetting come in. SLM uses a laser to fully melt powder, producing dense parts with mechanical properties close to wrought material. Binder Jetting forms the geometry first and then uses tightly controlled debinding and sintering cycles to achieve consistent density and structure, especially for materials like BJ-316L.
The difference is not just equipment. It is process stability. Atmosphere control, thermal profiles, shrinkage calibration, and inspection all work together to ensure the part you design is the part you get.
If you are working with real engineering requirements, especially for 3d printing of stainless steel, this level of control is not optional. It is what determines whether the part survives in use or fails during assembly.
At that point, the workflow becomes straightforward. You upload your CAD, select the material, and get a manufacturable result without guessing how the part will behave after sintering.
Upload your CAD file and get an instant quote for production-grade metal parts in seconds.
DIY vs Industrial Metal Printing Cost
The real cost difference between DIY metal printing and industrial metal additive manufacturing is not only about the printer itself, but the entire production workflow required to achieve usable metal parts.
Home metal printing systems based on metal filament or indirect processes require multiple additional components beyond the printer, including post-processing equipment and process control tools.
Cost Comparison Overview
| Factor | DIY Metal Printing | Industrial Metal Printing |
|---|---|---|
| Initial Equipment Cost | $5,000–$30,000+ (printer + furnace + setup) | No upfront equipment required |
| Process Type | Metal-filled filament + debinding + sintering | SLM / Binder Jetting |
| Infrastructure Cost | High (furnace, ventilation, gas handling) | Included in service |
| Part Density | Variable, process-dependent | High / controlled (up to ~99%+) |
| Accuracy | Shrinkage compensation required | Calibrated and repeatable |
| Production Consistency | Low to medium | High, production-grade |
| Material Access | Limited to filament-based metals | 316L, TC4, BJ-316L and more |
| Best Use Case | Learning & hobby projects | Functional engineering parts |
For a detailed breakdown of material expenses and machine time, you can refer to this guide on Industrial Metal Printing cost.
Cost Reality in Practice
Although DIY setups may appear cost-effective at the equipment level, the total system cost increases significantly once sintering equipment, thermal control systems, gas handling, and failed print iterations are included.
In contrast, industrial metal printing services distribute these costs across production systems, meaning users only pay for the final processed part rather than infrastructure and experimentation.
For most functional applications, especially for 3D printing metal at home alternatives, industrial workflows are typically more cost-efficient when considering total cost of ownership.
From a cost perspective, DIY metal printing is primarily suited for experimentation and learning workflows, while industrial metal printing remains more efficient for producing functional engineering parts with predictable outcomes.
FAQ about 3D Metal Printing at Home
Q1:Can you 3D print metal at home without sintering?
You can print metal-filled filaments, but without sintering the result is only a decorative composite, not a functional metal part.
Q2:What is the cheapest way to get metal 3D printed parts?
Outsourcing to a professional service is typically the lowest-cost option when you factor in equipment, materials, and failure rates.
Q3:How strong are home metal prints?
Green parts are weak due to binder content, and even after sintering at home they often contain porosity. In contrast, SLM-produced parts reach near-full density, giving significantly higher strength and reliability.
Conclusion: Choose Efficiency Over Complexity
The difference comes down to intent.
If you’re experimenting, learning, or prototyping concepts, home printing has value. It gives you access to the early stage of the process and helps you understand how geometry behaves.
But if the goal is a functional metal part, the process cannot stop at printing. It requires controlled debinding, precise sintering, and consistent material behavior. That is not something a desktop setup can reliably deliver.
Industrial workflows remove that uncertainty. They replace trial-and-error with process control, and guesswork with repeatability.
If you're working with real engineering requirements, especially for 3d printing of stainless steel, the efficient path is clear.
Skip the $10,000 setup.
Keep Learning
Metal Surface Polishing: Methods, Roughness & Ra Guide
Key Takeaways Metal surface polishing is not a cosmetic step—it is a controlled Ra reduction process that directly impacts friction, corrosion resistance, and coating adhesion. Different polishing methods are defined by achievable Ra ranges, not by process names. Mechanical, electrochemical, and mass finishing methods are not interchangeable—they operate in different geometry and production constraints. Selection rule: choose polishing method based on target Ra + geometry accessibility + production vo......
Can You 3D Print Metal at Home? Costs & Methods
Key Takeaways Not a Single Step: Metal 3D printing at home is a multi-stage process (Printing + Debinding + Sintering). The initial "green part" is a fragile composite, not functional metal. High Hidden Costs: While metal 3d printers for home are cheap, the specialized furnaces required for sintering cost $10,000–$30,000 and carry significant safety risks. Performance Limits: DIY parts often suffer from high porosity and unpredictable 15-20% shrinkage, unlike industrial SLM/BJ which reaches 99%+ densi......
Metal Polishing Processes Compared: 3D Printed vs Cast vs Machined Parts
What Is the Main Difference in Polishing 3D Printed, Cast, and Machined Metal Parts? The main difference lies in the starting surface condition and internal structure of the parts. Polishing metal parts requires a removal process to address defects related to the casting process. Cast parts need polishing to normalize their inherently uneven surface, while polishing 3D metal parts refines a geometrically controlled but rough surface. In other words, the goal of polishing changes depending on how the p......
Metal 3D Printing: An Overview Of The Technology And Its Process
What is Metal 3D Printing? Metal 3D printing, also known as additive manufacturing or metal additive manufacturing, creates three-dimensional items by selectively depositing or melting metal powders layer by layer. Electron beam melting (EBM) and selective laser melting (SLM) are two approaches used to accomplish this. To conventional manufacturing techniques, metal 3D printing offers enhanced design flexibility, intricate geometries, and great precision in producing complex and customized metal parts......
Selective Laser Melting (SLM) vs. Direct Metal Laser Sintering (DMSL)
Selective Laser Melting (SLM) and Direct Metal Laser Sintering (DMLS) stand as prominent players within the realm of metal 3D printing, each characterized by its unique approach. In the DMLS process, a high-powered laser follows a CAD model to selectively melt and sinter layers of metal powder. This method results in partial fusion of powder particles, offering versatility in material selection while potentially introducing slight porosity and variations in mechanical properties. On the other hand, SL......