DIY Filament Recycler: How to Build One, Cost & Process Guide
21 min
- What Is a DIY Filament Recycler?
- What Does a DIY Filament Recycler Actually Cost?
- How Does a DIY Filament Recycler Work?
- What Do You Need to Build a DIY Filament Recycler?
- How to Build a DIY Filament Recycler
- Sorting, Cleaning, and Drying: The Step Most Guides Skip
- Process Parameters by Material
- How to Control DIY Filament Diameter
- What Materials Can You Recycle With a DIY Filament Recycler?
- Can You Make Good Filament From Recycled 3D Prints?
- How to Test DIY Recycled Filament Before Printing
- Is Recycling Filament at Home Safe?
- DIY Filament Recycler vs. Buying vs. Sending Waste Away
- DIY Filament Recycler FAQs
- Filament Recycler DIY: An Engineering Project, Not Just a Melter
A DIY filament recycler turns clean 3D printing waste into new filament. The basic idea is simple: sort the waste, shred it, melt it, extrude it, cool it, measure the diameter, and wind it onto a spool. Building a reliable system is harder than the basic concept suggests. Shredding, moisture control, temperature stability, pulling speed, and filament diameter all affect the final result.
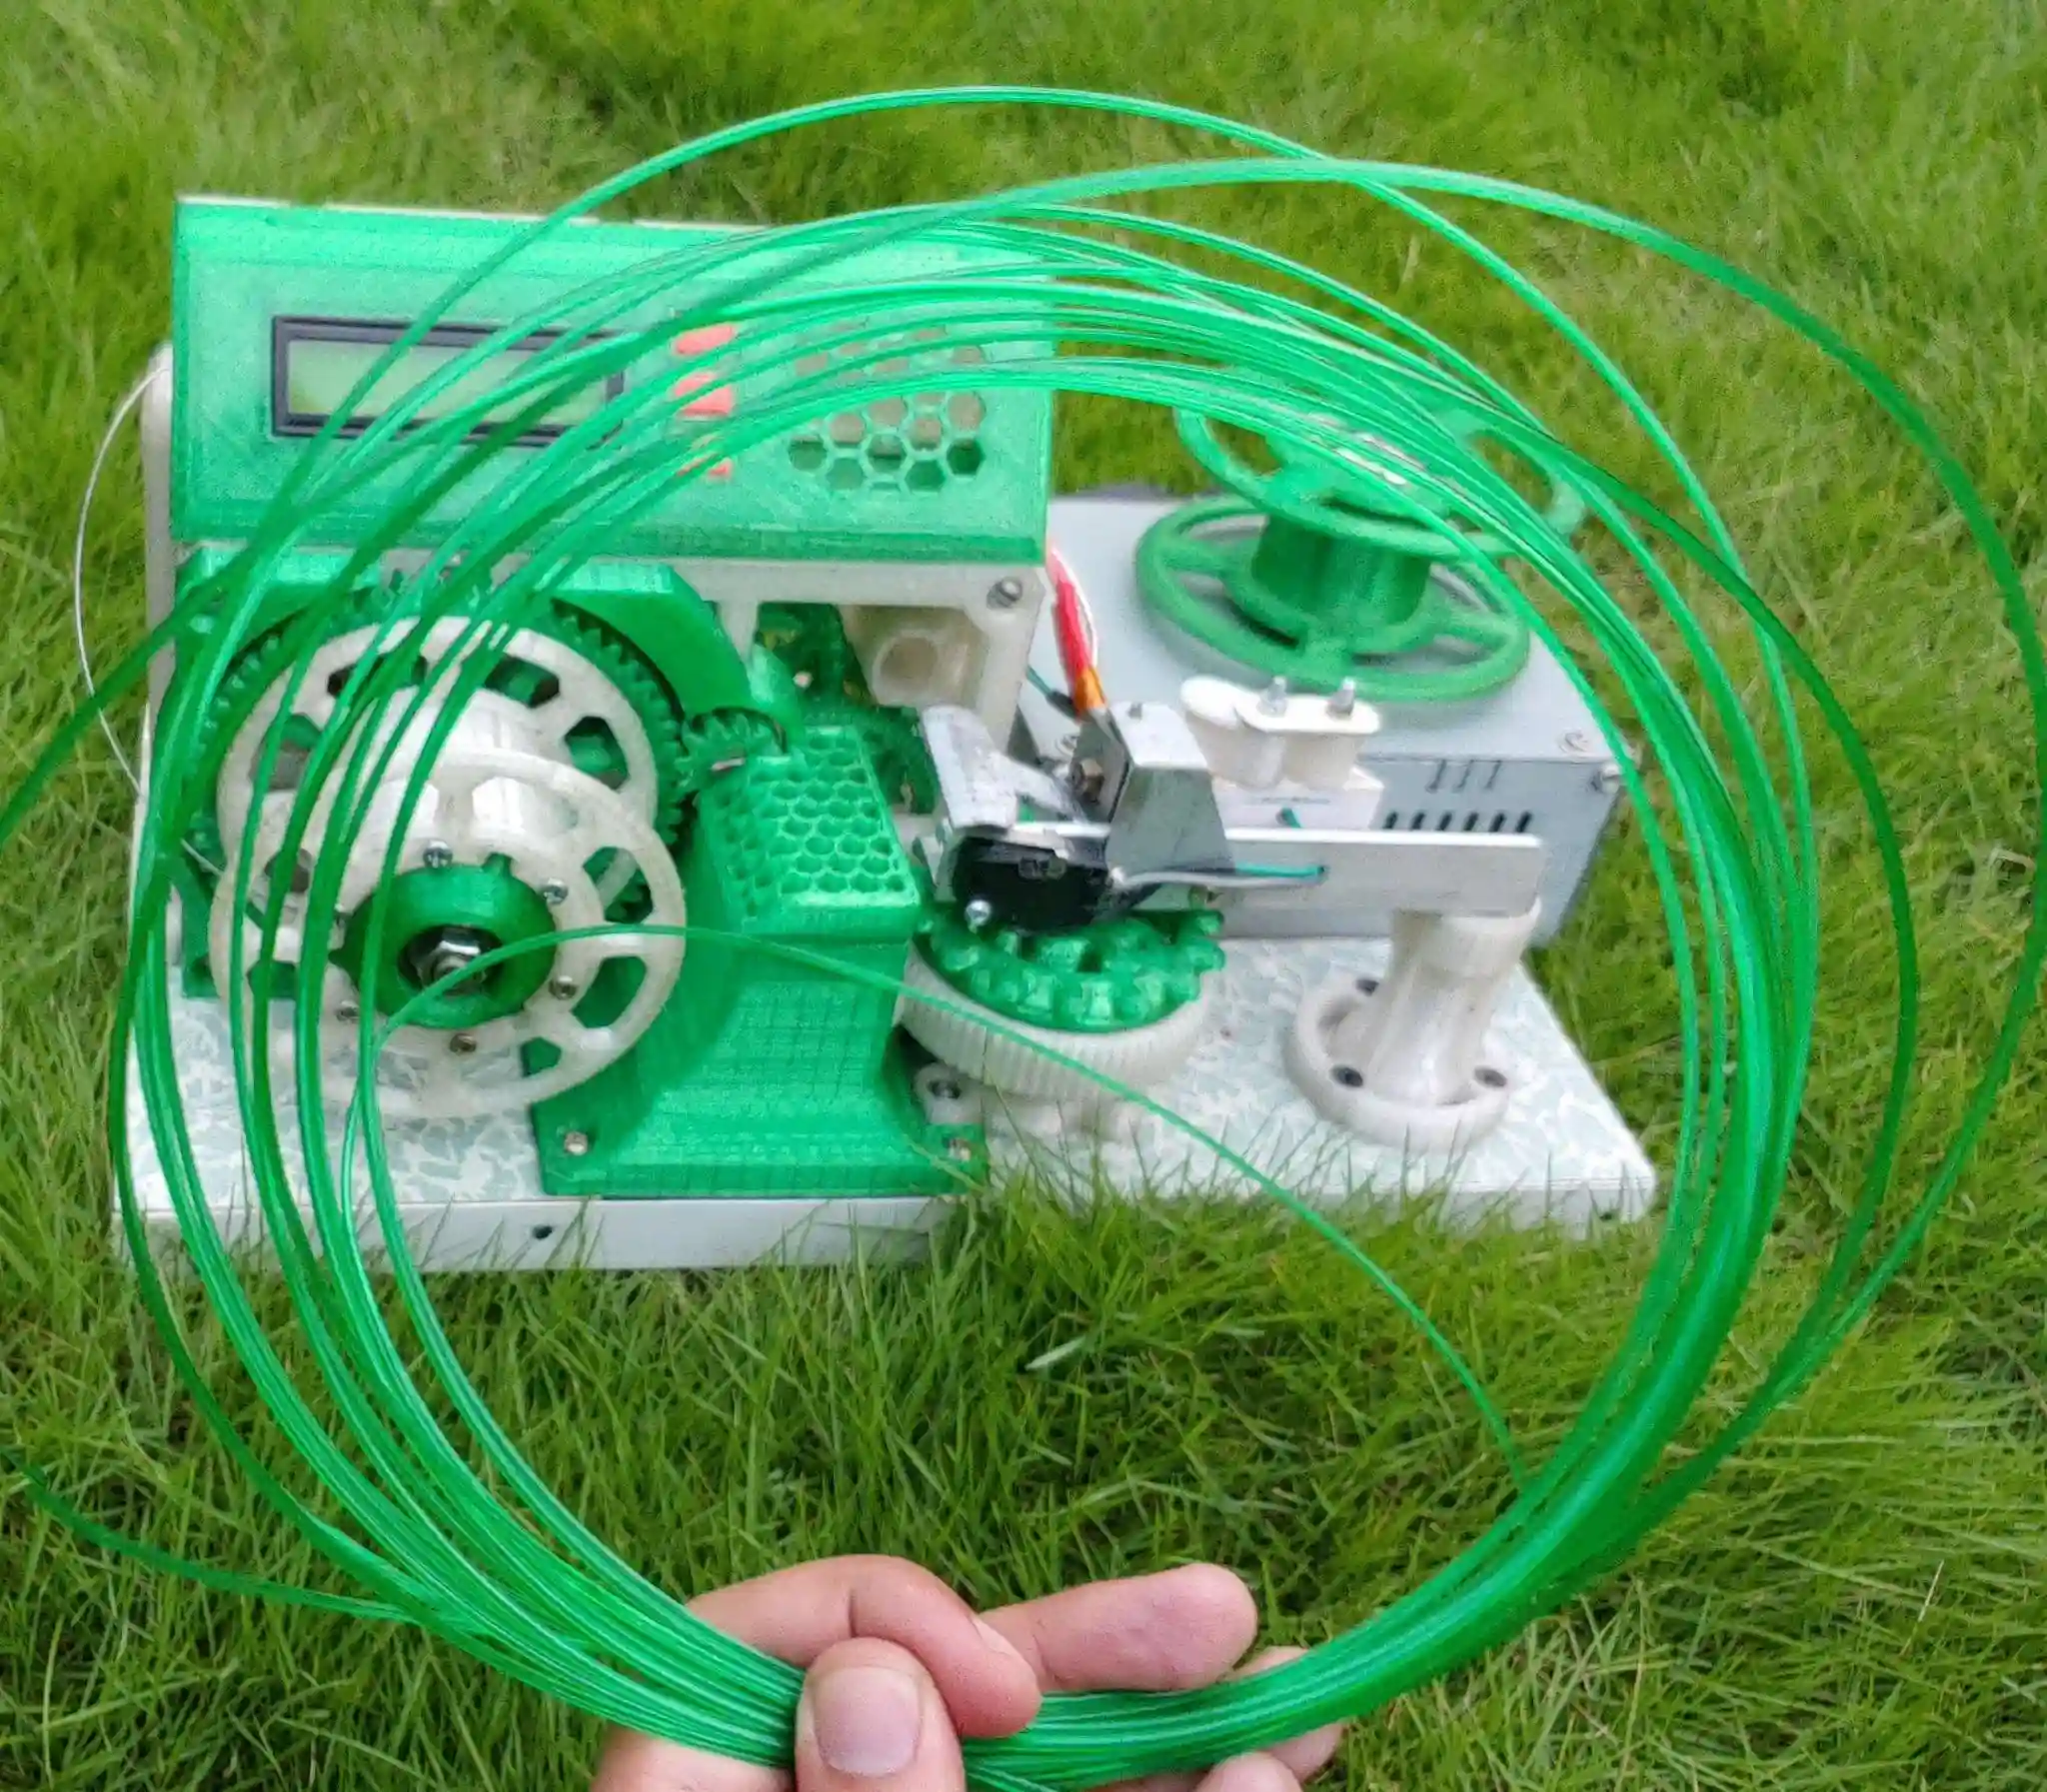
(Reddit) PET DIY filament recycler
For a hobbyist with a small amount of waste, buying filament is usually cheaper and easier. A DIY filament recycler starts to make more sense when you generate a steady stream of clean plastic, enjoy building machines, or want control over the recycling process.
What Is a DIY Filament Recycler?
A DIY filament recycler is a small recycling and extrusion system that converts discarded thermoplastic prints and filament scraps into new 3D printer filament.
The basic process looks like this:
3D printing waste
Size reduction
Melting
Extrusion
Cooling
Diameter control
Spooling
The important part is what happens between those arrows.
A working DIY filament recycler is more than a plastic extruder. A practical system needs several connected subsystems:
- Shredder or granulator
- Feed hopper
- Extrusion screw and barrel
- Heating and temperature control
- Die or nozzle
- Cooling section
- Puller
- Diameter measurement
- Spooler
Research on distributed filament recycling systems has used this same general architecture, combining shredding, extrusion, diameter sensing and spooling rather than treating the extruder as the entire recycling machine.
What Can a DIY Filament Recycler Do?
A well-sorted feedstock can include:
- Failed PLA prints
- Supports
- Brims and rafts
- Filament ends
- Clean purge material
- Other known, single-material thermoplastic waste
The word known matters.
A recycler does not know what plastic you put into the hopper. If a bin contains PLA, PETG, a little TPU, an unknown support material and a painted part, the machine will happily process the mixture. The resulting filament may not behave predictably.
What Can't You Easily Recycle?
Avoid feeding the machine:
- Mixed plastics
- Unknown plastics
- Heavily contaminated prints
- Composite materials unless the machine and process are designed for them
- Parts with large amounts of paint or coatings
- Prints containing embedded metal hardware
Material identification is one of the first quality-control steps, not something to worry about after extrusion.
Should You Build One?
| Monthly 3D printing waste | Practical recommendation |
|---|---|
| < 0.5 kg | Usually buy filament. The machine, setup time and tuning are hard to justify. |
| 0.5–2 kg | DIY can make sense if you enjoy machine building and want to reuse your own waste. |
| > 2 kg OR filament costs > $30/kg | A recycler becomes more interesting, especially if the waste is clean and consistent. |
| Main goal is avoiding landfill waste | DIY recycling can be worthwhile even when financial payback is weak. |
The last row is important. A DIY filament recycler does not have to be a money-saving machine to be useful.
Need consistent 3D printed parts without building and tuning a recycling line? JLC3DP can handle the printing side when repeatable output matters more than processing your own scrap. Get a free quote instantly.
What Does a DIY Filament Recycler Actually Cost?
This is where DIY recycling gets more interesting.
The extruder itself is not necessarily the most expensive part. The complete system needs material preparation, temperature control, pulling, measurement and winding. The shredder can become a major expense on its own.
The following ranges are best treated as planning budgets, not fixed market prices. Your costs will change significantly depending on how much you fabricate yourself, what parts you already own, and whether you import components.
| Cost tier | Approx. build budget | What you are getting |
|---|---|---|
| Minimum viable | $400–800 | Basic DIY frame, simple shredder, single extrusion zone, manual or basic diameter checking and simple spooler |
| Recommended hobby build | $800–1,500 | Better shredder, controlled heating, stronger drive system, cooling, puller, diameter measurement and powered spooling |
| High-end DIY / prosumer | $1,500–3,500+ | More robust shredding, multiple heating zones, closed-loop diameter control, better extrusion hardware and more automation |
For context, commercial desktop systems sit well above a basic DIY build. Felfil currently lists its complete Evo assembly kit at €699, an extruder plus spooler at €1,399, and a complete shredder/extruder/winder package at €2,999. Filabot lists its EX2 filament extruder at $2,945. Precious Plastic lists its basic shredder at €1,100 in material cost and its extrusion machine at €1,200 under its published Netherlands build assumptions.
That gives you a useful reality check. A serious DIY machine is not necessarily a $100 weekend project.
Don't Forget the Hidden Costs
Your budget should also include:
- Structural filament used to print brackets and housings
- Bearings, shafts, gears and fasteners
- Replacement heater cartridges
- Thermocouples or temperature sensors
- Motors and motor drivers
- Nozzles and filters
- Electricity
- Failed extrusion runs
- Shredder blade maintenance
- Shipping
- Customs or import duties
- Your own build and tuning time
That last one is easy to ignore because you do not receive a bill for your Saturday afternoon.
But if the goal is strictly saving money, your labor counts.
How Long Until It Pays for Itself?
A simple payback calculation is:
Payback period = total system cost ÷ monthly net filament savings
If you want a broader breakdown of where 3D printing costs actually come from, including material, machine time and post-processing, see our guide to 3D printing cost.
Monthly net filament savings should account for:
recycled filament output × comparable filament price − electricity − consumables − rejected material
For example, a $1,000 machine that genuinely saves you $50 per month has a simple payback period of 20 months.
That is very different from saying the machine “saves $50/month” because you recycled $50 worth of plastic. Failed batches, electricity, virgin pellets, maintenance and unusable output reduce the real saving.
This also explains why published DIY economics can look wildly different. One older filament-extruder project used an assumption of 16 spools per year and estimated roughly a one-year payback for its recycling prototype. More recent analysis of desktop recycling points toward hundreds of kilograms of recovered material being needed for some equipment to break even. The assumptions are fundamentally different: machine cost, filament consumption, electricity, labor, scrap rate and what counts as a saving all change the result.
So don't build a DIY filament recycler because somebody promised instant ROI.
Build one because you have enough waste to make the experiment worthwhile.
How Does a DIY Filament Recycler Work?
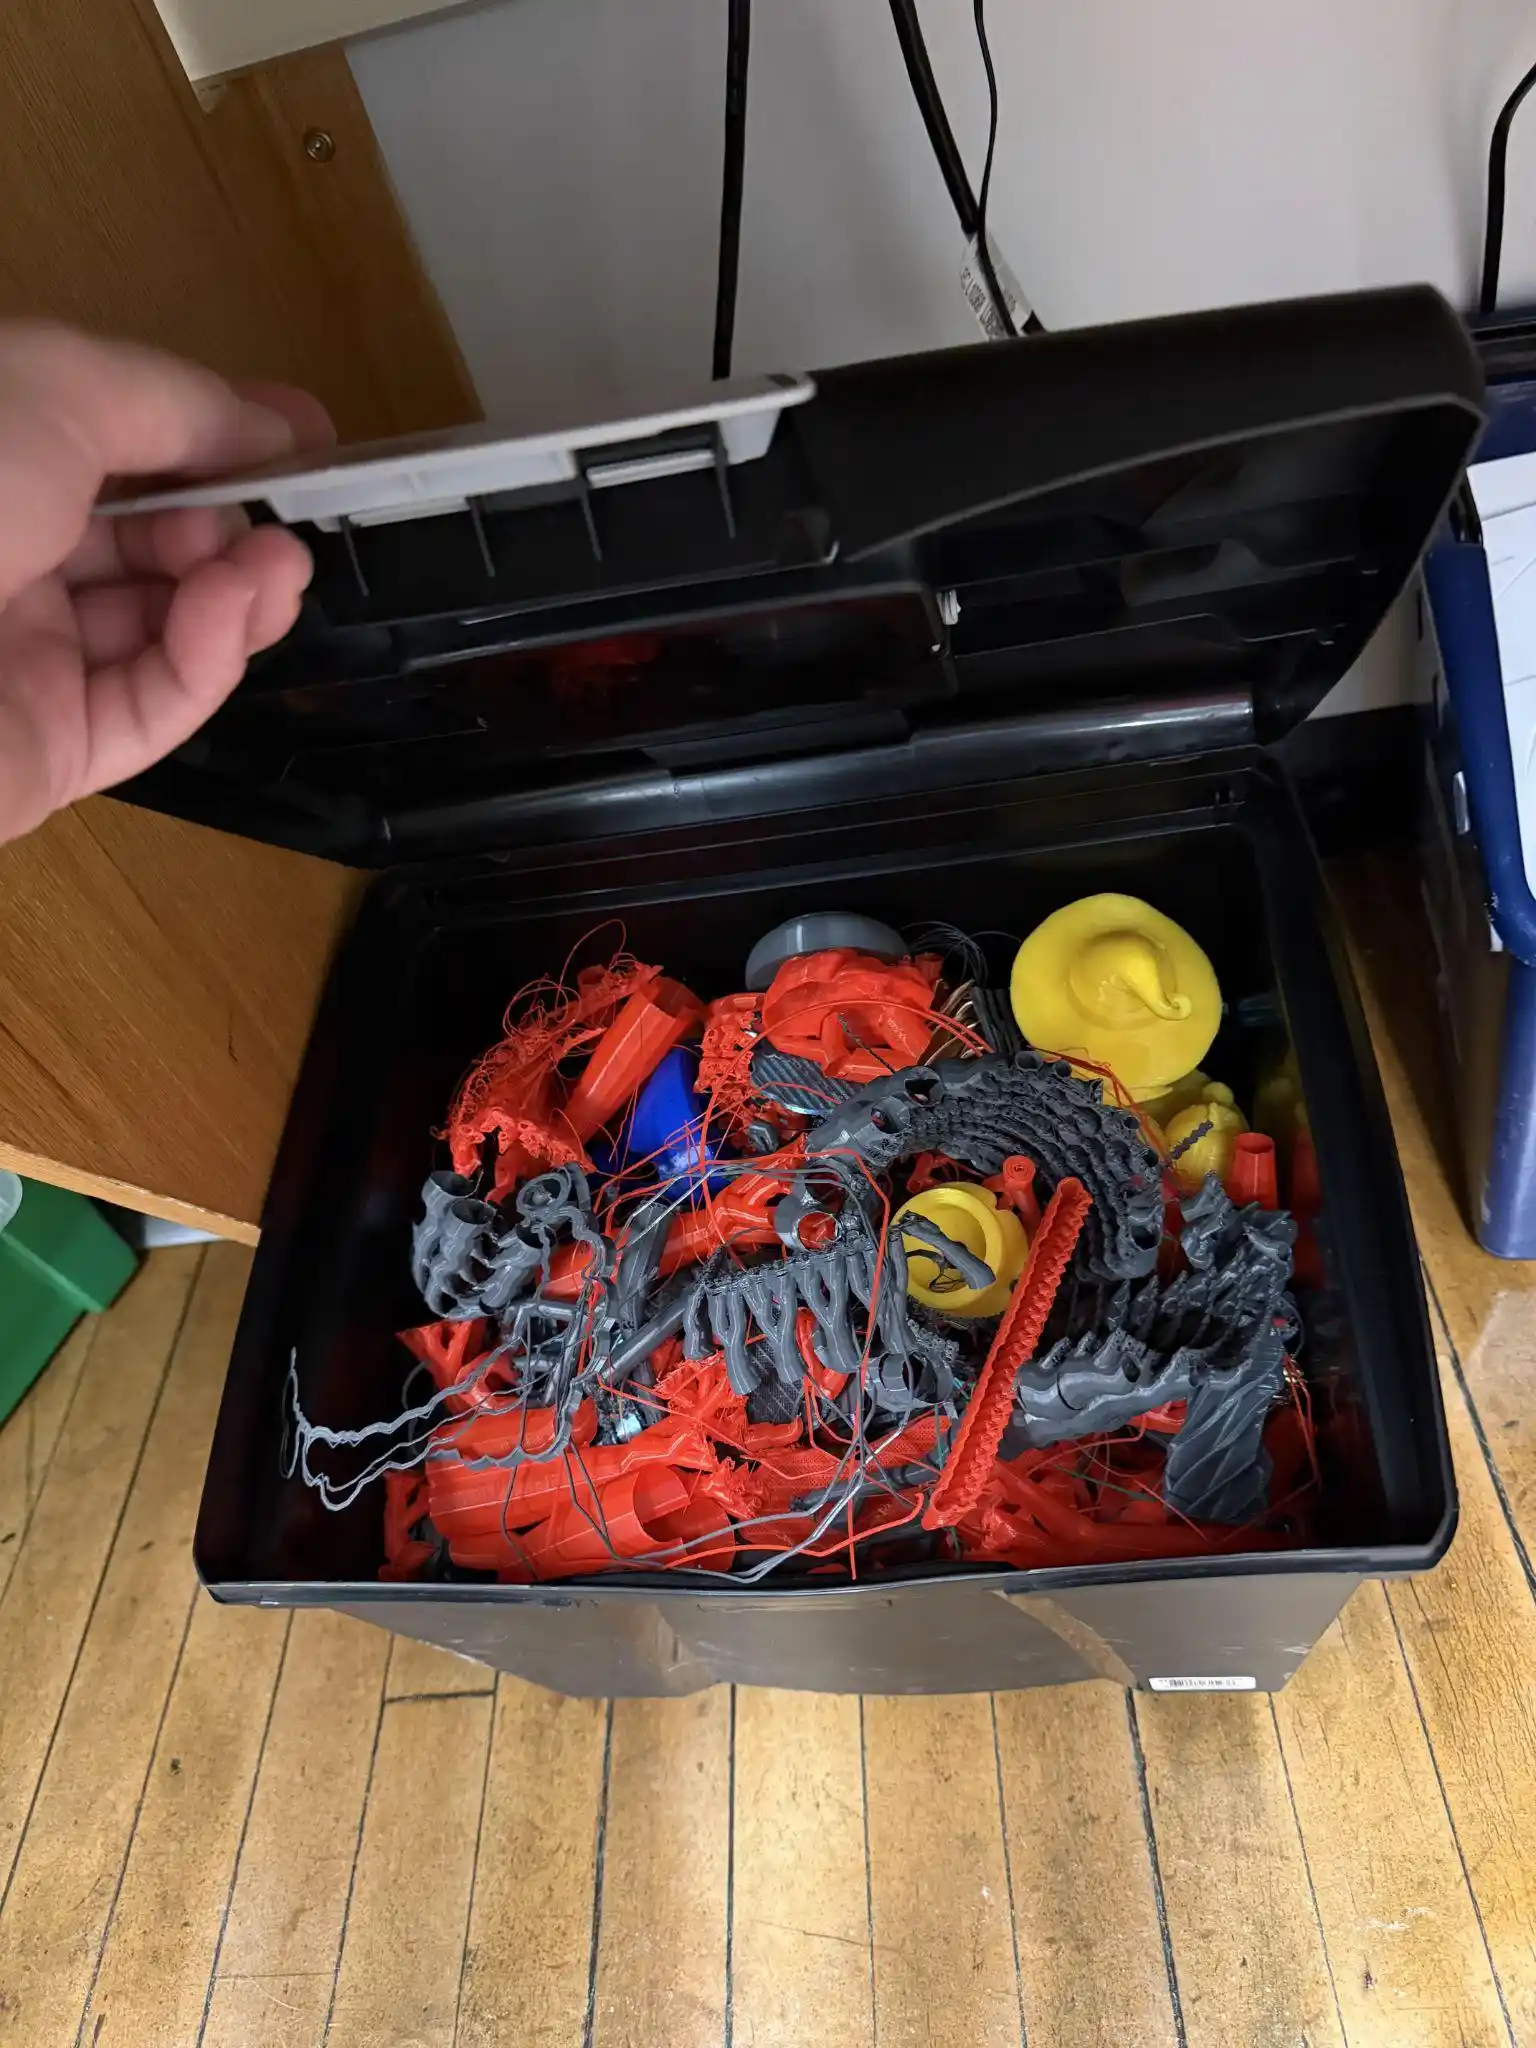
(Reddit) 3D printer waste
The working principle is straightforward:
3D printing waste → Sort → Clean → Dry → Shred → Extrude → Cool → Measure → Spool
Each stage solves a different problem.
For a broader look at collecting, sorting, shredding, drying, extruding, and spooling 3D printing waste, see our guide to 3D printer filament recycling.
| Stage | Purpose |
|---|---|
| Sorting | Separate materials and colors |
| Cleaning | Remove dust, adhesive and foreign material |
| Drying | Reduce moisture before processing |
| Shredding | Create consistent feedstock |
| Extrusion | Melt and form the polymer |
| Cooling | Solidify the filament |
| Diameter control | Keep the filament within a usable size range |
| Spooling | Wind the finished filament without tangles |
1Where Beginners Get Stuck: Sorting
The machine cannot compensate for bad feedstock.
Keep separate containers for PLA, PETG, ABS/ASA and other materials. If you also care about color consistency, sort by color within each material group.
2Where Beginners Get Stuck: Cleaning
A little dust may not look important. Once it reaches a hot extrusion zone, it becomes part of the material stream.
Remove dirt, labels, adhesive residue and other obvious contaminants before shredding.
3Where Beginners Get Stuck: Drying
Moisture can cause bubbles, popping, inconsistent extrusion and changes in processing behavior.
Drying requirements vary by material and formulation. As one manufacturer reference, Prusa currently lists about 45℃ for 6 hours for PLA/rPLA and 55℃ for 6 hours for PETG, while higher-temperature materials require different settings. Always check the filament manufacturer's guidance rather than treating one drying temperature as universal.
4Where Beginners Get Stuck: Shredding
This is one of the most underestimated parts of a DIY filament recycler.
The shredder needs enough torque to break prints into manageable pieces without constantly jamming. Blade geometry, shaft torque, screen aperture and feed throat design all matter.
Commercial plastic shredders can also cost as much as, or more than, the extrusion hardware. Precious Plastic's published basic-machine figures, for example, put its shredder and extrusion machine in roughly the same material-cost range.
This section explains how the system works. The actual build comes next.
What Do You Need to Build a DIY Filament Recycler?
A basic system can be divided into these major components.
| Component | Function | Necessity | Common pitfall |
|---|---|---|---|
| Shredder / granulator | Reduces waste to feedable pieces | Required | Underestimating torque and jam protection |
| Hopper | Feeds plastic into the extruder | Required | Material bridging and inconsistent feeding |
| Heating zone | Brings polymer to its processing temperature | Required | Uneven heating |
| Extruder screw | Conveys and compresses material | Required | Insufficient torque |
| Barrel | Contains the melt and screw | Required | Poor thermal control |
| Die / nozzle | Forms the extrudate | Required | Incorrect geometry or connection |
| Cooling | Solidifies the filament | Required | Uneven cooling |
| Puller | Controls line speed | Recommended | Speed instability |
| Diameter sensor | Measures filament size | Recommended | Relying entirely on manual checks |
| Spooler | Winds finished filament | Recommended | Poor tension and overlapping coils |
A filament recycler is therefore a small process line.
The extruder creates the plastic strand. The rest of the system determines whether that strand is useful.
How to Build a DIY Filament Recycler
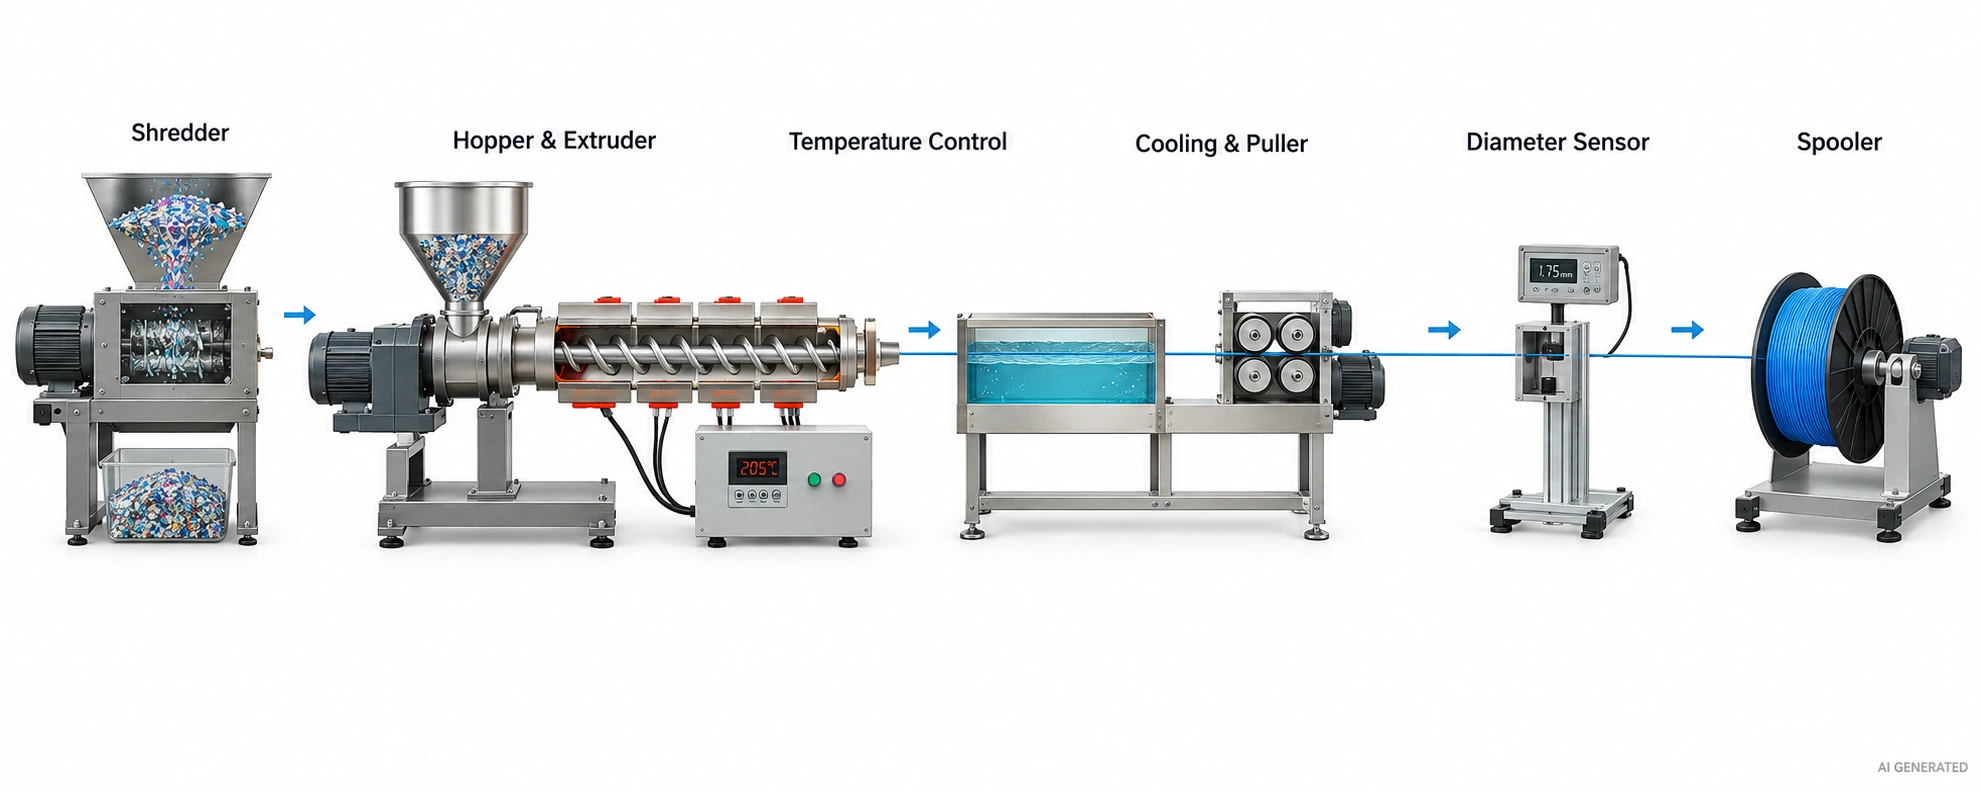
You do not need to design every component from scratch. The practical approach is to build around the major subsystems and make sure their speeds and temperatures work together.
1. Build the Plastic Shredding System
Start with a shredder that can consistently reduce your chosen waste into pieces small enough for the hopper and screw.
For a first build, don't try to process every type of plastic. Choose one material, such as PLA, and size the shredder around it.
A consistent feedstock makes everything downstream easier.
A screen or sieve can also help limit oversized pieces. Research on recycled PLA filament has shown that controlling shred size can improve material mixing and filament consistency.
2. Build the Extrusion System
The extrusion section normally contains:
- Hopper
- Barrel
- Screw
- Heater zones
- Temperature sensors
- Die
The screw pushes the shredded plastic through the heated barrel. As the material moves forward, it melts and becomes a continuous polymer stream.
Screw geometry matters here. A motor powerful enough to turn the screw is not enough if the screw cannot maintain stable conveying and pressure.
3. Add Temperature Control
Temperature control is one of the parts worth spending money on.
Use appropriate heaters and temperature sensors connected to a controller. The goal is not simply reaching a high temperature. You want a stable processing temperature that matches the polymer.
PLA, PETG, ABS, nylon and other materials do not share one universal extrusion setting.
And don't confuse melting temperature with a safe processing temperature. Excessive heat or excessive residence time can contribute to material degradation.
4. Add Cooling and Pulling
The filament leaving the die is still soft.
It needs to cool enough to hold its shape before being wound onto the spool. The puller then determines how quickly the filament is drawn away from the die.
This creates a useful relationship:
Extrusion rate + puller speed + cooling + die geometry → filament diameter
A faster pull generally produces a thinner strand. A slower pull generally produces a thicker strand, assuming the other conditions remain stable.
The exact response depends on your machine, melt behavior and die.
5. Add Diameter Measurement
This is the difference between “I made plastic string” and “I made filament.”
A diameter sensor can continuously measure the extruded strand. A control system can then adjust the puller or extrusion speed to correct drift.
Research into distributed filament recycling systems has specifically used closed-loop diameter control because filament dimensional accuracy is a central part of producing usable recycled filament.
6. Add a Spooling System
The finished filament needs to be wound evenly.
Keep the spool tension stable and move the winding point across the spool width. If the filament piles up in one location, you can create tangles or uneven winding.
A powered spooler is useful, but it does not need to be complicated for a first machine.
Sorting, Cleaning, and Drying: The Step Most Guides Skip
Good recycling starts before the shredder.
Identify the Plastic
For a DIY setup, the safest identification method is still to start with material that you already know.
Labels from the original filament spool, purchase records and dedicated waste bins are much better than guessing from appearance.
You may see DIY guides recommending:
- Density testing
- Hot-knife or melting tests
- Flame tests
- Flexing and fracture behavior
These can provide clues, but they are not equivalent to laboratory polymer identification. A printed composite or modified filament can behave differently from a plain polymer.
For valuable or safety-critical material, don't guess.
Clean the Feedstock
Remove:
- Dust
- Dirt
- Adhesive residue
- Tape
- Foreign plastic
- Embedded metal inserts
- Large amounts of paint or coating
A clean single-material feedstock is much easier to control.
Dry the Material
Moisture is particularly important for hygroscopic materials such as nylon.
As a practical reference, Prusa currently recommends 45℃ for 6 hours for PLA/rPLA, 55℃ for 6 hours for PETG, 60℃ for 4–6 hours for TPU, 80℃ for 4 hours for ASA, and higher settings for several PC and PA materials. These are material-specific recommendations, not universal recycling settings.
Wet material can produce popping or bubbling during extrusion. You may also see a rougher surface and unstable flow.
If you hear the material crackling as it passes through the hot zone, stop assuming the screw speed is the only problem.
For a closer look at filament moisture, dry-box setups, drying methods, and storage, see our guide to 3D printer filament dry boxes.
Can You Mix Plastics?
Keep the first machine simple.
PLA + PLA: generally sensible if the material is compatible.
PLA + PETG: don't treat them as interchangeable feedstock.
Unknown + anything: don't put it in the machine.
Different polymers have different processing windows and melt behavior. Even when two plastics appear to extrude at roughly similar temperatures, that does not make them compatible in a recycled filament blend.
Process Parameters by Material
There is no universal DIY filament recycler temperature table.
The actual barrel temperature depends on polymer grade, additives, moisture, screw design, residence time, die geometry and machine configuration.
Use the table below as a starting framework, not a machine recipe.
| Material | General processing difficulty | Main issue |
|---|---|---|
| PLA | Low | Relatively easy starting material, but still sensitive to thermal history and moisture |
| PETG | Medium | Sticky melt and cooling control |
| ABS | Medium–High | Higher processing temperature and ventilation requirements |
| ASA | Medium–High | Similar temperature and ventilation concerns |
| TPU | High | Flexible feedstock and pulling can be difficult to control |
| PP | High | Different melt behavior and shrinkage |
| PC | High | Higher processing temperatures and tighter process control |
| PA / Nylon | High | Moisture control becomes critical |
The safest approach is to establish the processing window from the filament manufacturer's datasheet, then tune the machine around that material.
How to Control DIY Filament Diameter
Filament diameter is where many DIY filament recycling projects become frustrating.
You can have perfectly clean plastic and a functioning extruder and still produce filament that swings between too thick and too thin.
The main variables are:
Extrusion rate + puller speed + cooling + die size
For more on why filament diameter matters for FDM feeding and extrusion, see our guide to 3D printer filament diameter.
| Problem | Possible cause | Possible adjustment |
|---|---|---|
| Filament too thick | Pulling too slowly | Increase pull speed |
| Filament too thin | Pulling too quickly | Reduce pull speed |
| Diameter fluctuates | Unstable feed or melt | Improve feed and temperature control |
| Oval filament | Uneven cooling or alignment | Improve cooling and guide alignment |
| Rough surface | Contamination or unstable melt | Improve material preparation and extrusion stability |
These are troubleshooting directions, not fixed recipes.
For example, increasing pull speed may reduce diameter, but if the extruder feed is pulsing, the filament may continue to fluctuate. You have to stabilize the whole process rather than chasing one variable.
A diameter sensor becomes particularly useful here because it gives you continuous information instead of a measurement every few meters.
What Materials Can You Recycle With a DIY Filament Recycler?
A DIY filament recycler can potentially process several thermoplastics, but the machine does not make them equally easy.
| Material | DIY recycling consideration |
|---|---|
| PLA | Good starting material for a controlled first project |
| PETG | Requires more attention to melt behavior and cooling |
| ABS | Requires higher-temperature processing and good ventilation |
| ASA | Similar processing and ventilation considerations to ABS |
| Nylon | Moisture control is especially important |
| TPU | Difficult because flexible feedstock can be harder to convey and pull |
| PP | Requires material-specific process tuning |
| PC | Higher-temperature equipment and control required |
| PC-ABS | Process according to the specific grade rather than assuming generic ABS settings |
The important point is simple: different polymers need different drying, heating, extrusion and cooling conditions.
A machine that works well with PLA does not automatically become a PETG, nylon or PC recycling machine.
Can You Make Good Filament From Recycled 3D Prints?
Yes. But “good” needs a definition.
Recycled filament can be printable while still being less predictable than commercial filament. The main variables are feedstock purity, moisture, thermal history, extrusion stability and diameter control.
Research has demonstrated printable recycled PLA made from real 3D-printing waste. However, the results vary between studies. One 2024 study found that fully recycled PLA could produce printable material, while another 2024 study found that fully recycled PLA parts had tensile and flexural strengths more than 15% below virgin filament under its test conditions.
An earlier study also found similar average mechanical properties between virgin and recycled PLA but greater variability in the recycled material and occasional nozzle clogging.
So there is no honest universal statement that “recycled filament is weaker.”
The better statement is:
Recycled filament can work, but its properties depend on how consistently you control the material and process.
Keep Learning
DIY Filament Recycler: How to Build One, Cost & Process Guide
A DIY filament recycler turns clean 3D printing waste into new filament. The basic idea is simple: sort the waste, shred it, melt it, extrude it, cool it, measure the diameter, and wind it onto a spool. Building a reliable system is harder than the basic concept suggests. Shredding, moisture control, temperature stability, pulling speed, and filament diameter all affect the final result. (Reddit) PET DIY filament recycler Need3D printed parts without managing recycling equipment? JLC3DP provides indus......
PLA Recycling: Can You Recycle PLA & How?
Key Takeaways PLA is recyclable because it is a thermoplastic that can be reprocessed into new materials. Recycling PLA is different from composting, and most household recycling programs do not accept PLA by default. Clean, dry, and properly sorted PLA waste produces better recycled material than mixed or contaminated waste. PLA can be recycled into new 3D printing filament, but extrusion control, moisture, and filament diameter affect print quality. Repeated heating and processing can change PLA's m......
3D Printer Filament Recycling: How to Recycle and Reuse Filament Waste
Key Takeaways 1. You can recycle 3D printer filament, but it's more involved than tossing it in the recycling bin. 2. Most common filament materials like PLA, PETG, and ABS can technically be recycled, though the quality of the recycled output depends heavily on how clean, dry, and uncontaminated the waste is. 3. Recycling 3D printer filament at home requires a shredder and extruder at minimum. 4. For most people without that equipment, the practical options are filament take-back programs, makerspace......
3D Printing Recycling: For Sustainability
With the rapid development of 3D printing technology, how to effectively recycle and reuse waste generated during the printing process has become an important issue that needs to be solved in the industry. Reducing printing waste can not only reduce costs, but also is a key step to achieve sustainable development. This article will explore how to reduce waste in 3D printing and introduce some practical 3d printing recycling application cases. Source: https://www.3dnatives.com/en/10-reasons-why-3d-prin......
The Impact of 3D Printing on Sustainability
Introduction In recent years, 3D printing has emerged as a revolutionary technology with the potential to transform various industries. Its impact on sustainability has been a topic of increasing interest and debate. In this article, we will explore the ways in which 3D printing influences sustainability and discuss the potential benefits and challenges associated with this rapidly advancing technology. Reduced Waste Traditional manufacturing processes often result in significant material wastage. In ......
Enhancing Sustainability And Waste Reduction In 3D Printing
Enhancing sustainability and waste reduction in 3D printing is crucial for minimizing environmental impact, conserving resources, reducing waste, achieving cost efficiency, stimulating innovation, meeting consumer demands, and complying with regulations. By optimizing material usage, implementing recycling practices, and promoting sustainable materials, 3D printing can contribute to a more environmentally responsible and economically viable manufacturing industry while attracting environmentally-consc......