PLA Smoothing: How to Get Smooth PLA Prints (Method-by-Method Guide)
18 min
- What Is PLA Smoothing?
- How to Choose a PLA Smoothing Method
- Can You Chemically Smooth PLA?
- A Practical Workflow for Smoothing PLA Prints
- Common PLA Smoothing Problems and How to Fix Them
- Does Smoothing PLA Affect Strength and Dimensions?
- FAQs about PLA Smoothing
- Beyond Smoothness: Preserve Detail and Fit
PLA 3D prints often show visible layer lines, seams, and rough surfaces, especially on curved or angled areas. PLA smoothing helps improve surface quality and prepare parts for painting or other finishing processes. Explore these 3D print smoothing methods to learn more about different finishing techniques. However, not every method works equally well on PLA, and some techniques can affect dimensional accuracy or damage fine details.
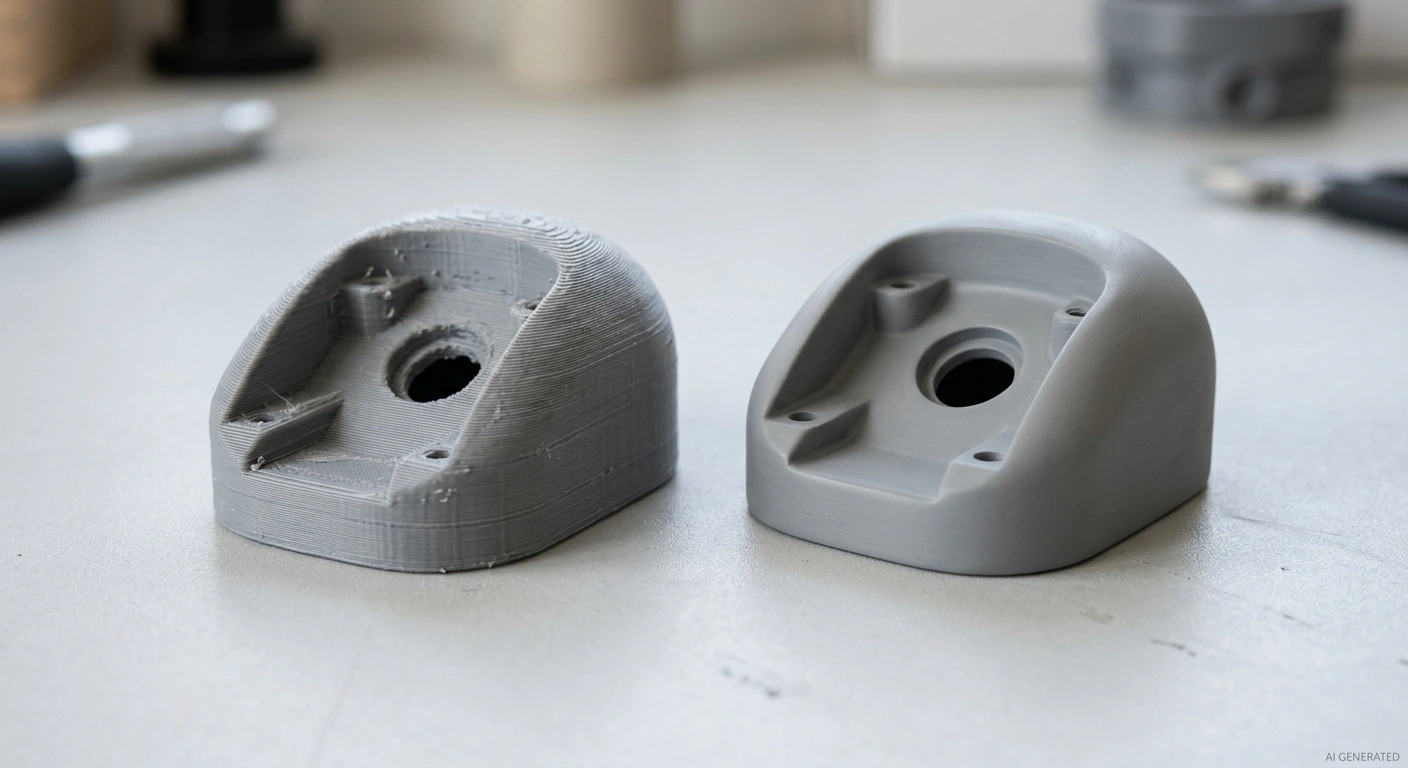
Before and after pla 3d prints smoothing
This guide compares common PLA smoothing methods, explains how to choose the right approach for your print, and covers the limitations and safety considerations of sanding, coatings, heat, and chemical treatments.
Key Takeaways
- Sanding plus filler primer is the most reliable general-purpose approach for painted PLA prints.
- Acetone does not work as a dependable smoothing solvent for standard PLA.
- Heat guns and hot water can deform PLA because it softens near its glass transition temperature.
- Epoxy coatings can hide layer lines, but they add thickness and may affect fit.
- Chemical smoothing can work with certain solvents or specialty products, but results and risks vary by formulation.
- Smoothing does not automatically improve strength or make a part food-safe.
What Is PLA Smoothing?
PLA smoothing is the process of reducing visible layer lines, roughness, seams, and other surface imperfections on 3D-printed PLA parts. Depending on the desired finish, this can involve removing material through sanding, filling surface defects with primer, applying a coating, or using a specialized treatment.
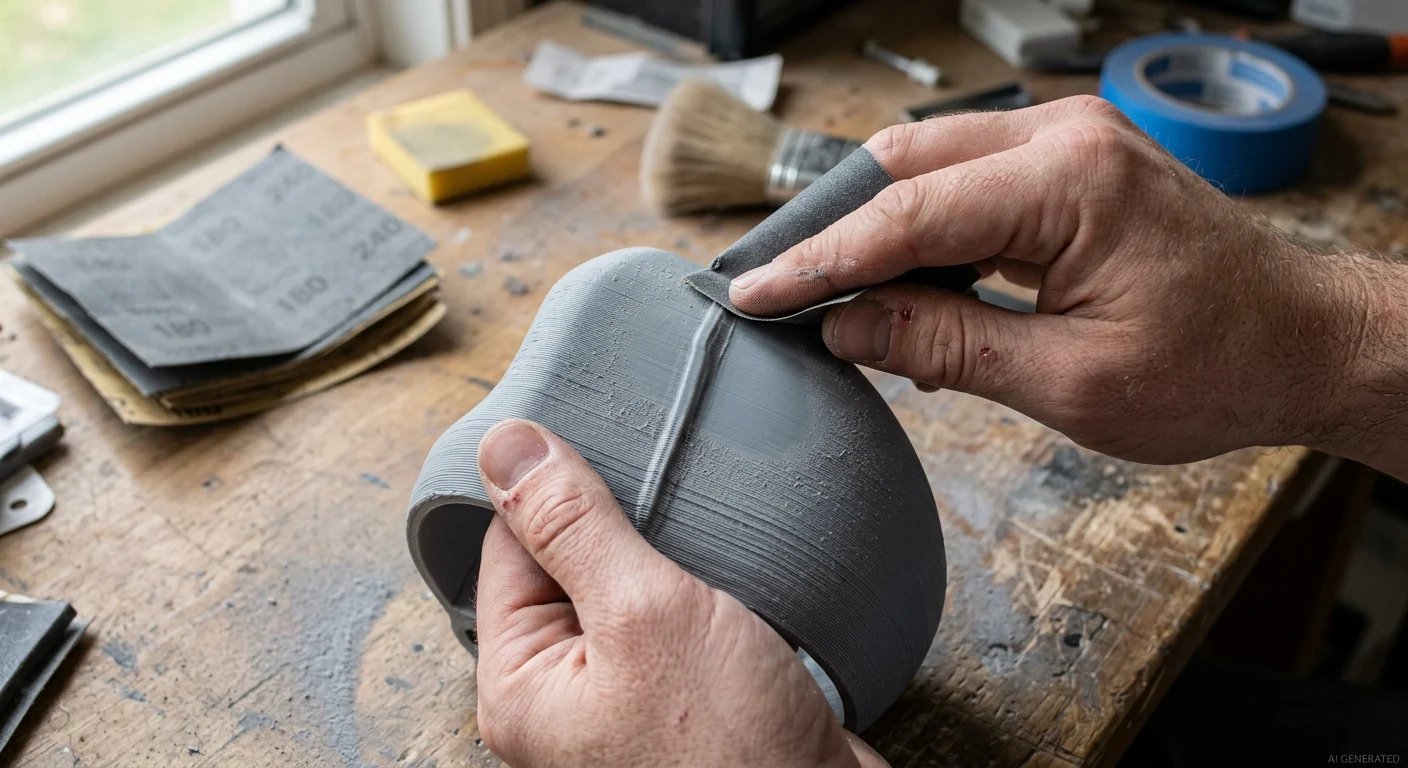
Alt text: hands sanding the surface of a gray pla 3d print
Unlike ABS, which can often be smoothed using acetone under suitable conditions, ordinary PLA does not respond reliably to acetone. Learn more about the differences in our ABS vs. PLA comparison. PLA's chemical composition and formulation affect its response to solvents, so a treatment that works on one plastic should not automatically be assumed to work on another.
PLA also has a relatively low glass transition temperature, commonly around 55–60℃, although the exact value depends on the formulation. Excessive heat can soften or deform a printed part before the surface becomes uniformly smooth. For heat-sensitive applications, also check the relevant PLA temperature resistance guide to better understand PLA's thermal limitations.
The best method depends on the part's geometry, the severity of its surface defects, the desired appearance, and whether dimensional accuracy must be maintained.
PLA Smoothing Methods Compared at Glance
For practical PLA 3D print smoothing, the main choice is between removing the rough surface, covering it with a new layer, or softening it with heat or a compatible chemical process.
The comparison below gives indicative hobby-workshop estimates, not results from a controlled test. Time depends on the part's size, geometry, layer height, and the finish you expect. Costs vary by location, product, and whether you already own the tools.
| Method | Typical result | Time per small part | Cost | Dimensional change | Potential effect on strength | Difficulty | Main safety concern |
|---|---|---|---|---|---|---|---|
| Sanding | Matte, smooth surface with enough work | 30 min to several hours | Low | Material is removed | Can weaken thin sections if over-sanded | Easy to moderate | Plastic dust |
| Polishing | Higher shine after fine sanding | 10–30 min after sanding | Low | Usually small, but depends on the compound and tool | Excess heat can damage the surface | Easy | Dust and heat from powered tools |
| Filler primer | More uniform surface for painting | Several hours to a day or more, including drying | Low to moderate | Adds a thin layer; sanding removes some | Usually little direct effect, but coating may hide defects | Easy to moderate | Spray mist and solvent vapors |
| Epoxy coating such as XTC-3D | Smooth, often glossy surface | About 15–30 min to apply, plus curing | Moderate | Adds thickness and may round details | May reinforce the surface locally, but does not prove the part is stronger | Moderate | Skin and eye contact, mixing heat, and ventilation |
| Heat gun | Can soften visible ridges locally | Minutes | Low if you own a heat gun | High risk of warping or rounding features | Heat can alter geometry and layer structure | Difficult to control | Burns, hot surfaces, and fumes from overheated material |
| Hot-water treatment | Unpredictable; may soften or deform the part | Minutes plus cooling | Low | Potentially significant deformation | Can affect fit and shape; strength impact is not predictable | Easy to attempt, difficult to control | Hot water and unexpected deformation |
| Specialty filament with a compatible smoothing system | Can reduce layer lines and create a glossy surface | Usually tens of minutes, plus drying | High initial equipment cost | Surface material can soften and fine features may change | Depends on the filament and degree of treatment | Moderate | Flammable alcohol and vapor exposure |
These times are rough planning ranges, not guarantees. A large cosplay prop can take hours to sand and prime, while a small figurine with deep layer lines may need several rounds of filling and sanding. A smooth-looking coating can also conceal defects rather than fix the underlying geometry.
How to Choose a PLA Smoothing Method
The best way to smooth PLA 3D prints depends on what the part needs to do after finishing.
| Your goal | Method to consider | What to keep in mind |
|---|---|---|
| Remove visible layer lines | Sanding | Choose the abrasive sequence based on defect severity |
| Prepare a part for painting | Sanding followed by filler primer | Additional filling and sanding may be needed |
| Improve gloss | Polishing or a suitable coating | The surface usually needs preparation first |
| Cover small surface imperfections | Epoxy coating | Coating thickness can affect details and fit |
| Avoid manual sanding | Filler primer or a suitable coating | These methods may not fully hide deep defects |
| Preserve tight tolerances | Minimal, localized finishing | Protect functional surfaces and check dimensions |
| Treat PLA using heat or solvents | Use caution and verify compatibility | Results are less predictable and may damage the part |
For functional parts, surface appearance should not be the only consideration. If a part contains threaded holes, mating surfaces, snap-fit features, or precision openings, prioritize dimensional accuracy over achieving a perfectly smooth finish.
Different PLA smoothing methods produce different results. Sanding removes material, filler primer fills shallow imperfections, and coatings create an additional surface layer. Heat and chemical treatments have more limitations and require extra care.
1Sanding PLA Prints
Sanding PLA is one of the best ways to smooth PLA prints because it physically removes surface irregularities, including layer lines and support marks. For a step-by-step guide, see how to sand 3D prints.
Start by removing supports and other obvious defects. Use a coarser abrasive only where more material needs to be removed, then move to finer grits to reduce scratches. The appropriate grit sequence depends on the print's initial surface quality and the finish you want.
Work gradually and apply even pressure. Excessive sanding in one area can flatten edges, round corners, or remove small details. For complex geometries, use smaller pieces of sandpaper or suitable sanding tools to reach difficult areas.
After sanding, remove dust before applying primer, paint, or another coating. If the part will be painted, the surface may need additional filling and sanding to achieve a consistent finish.
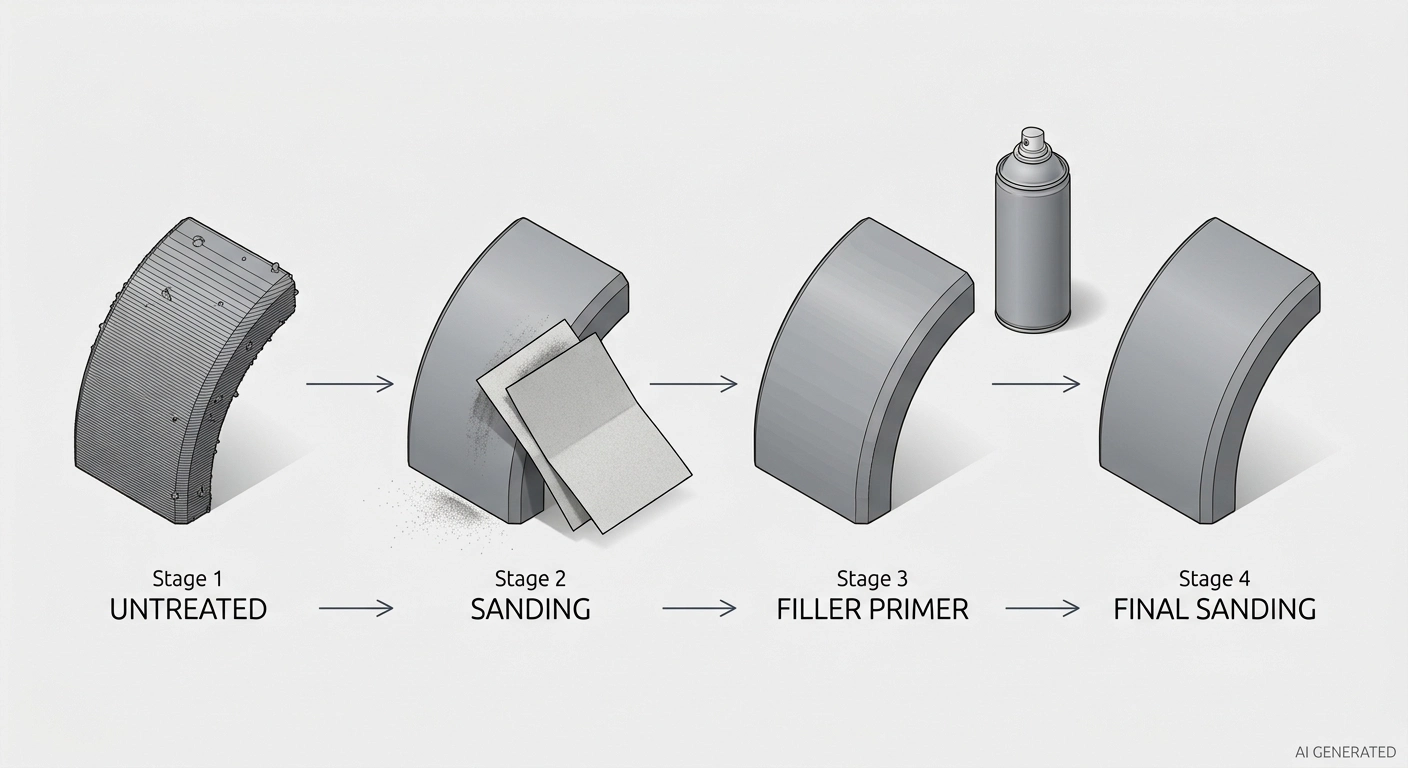
To smooth out a PLA print, first remove the defects that need material removal, then decide whether the surface needs polishing, filling, or a coating. The workflow below covers the common methods and explains where each one fits.
2Using Filler Primer
Filler primer helps fill shallow layer lines and small surface imperfections before painting. It is particularly useful when sanding alone would require substantial effort or when a consistent painted finish is the goal.
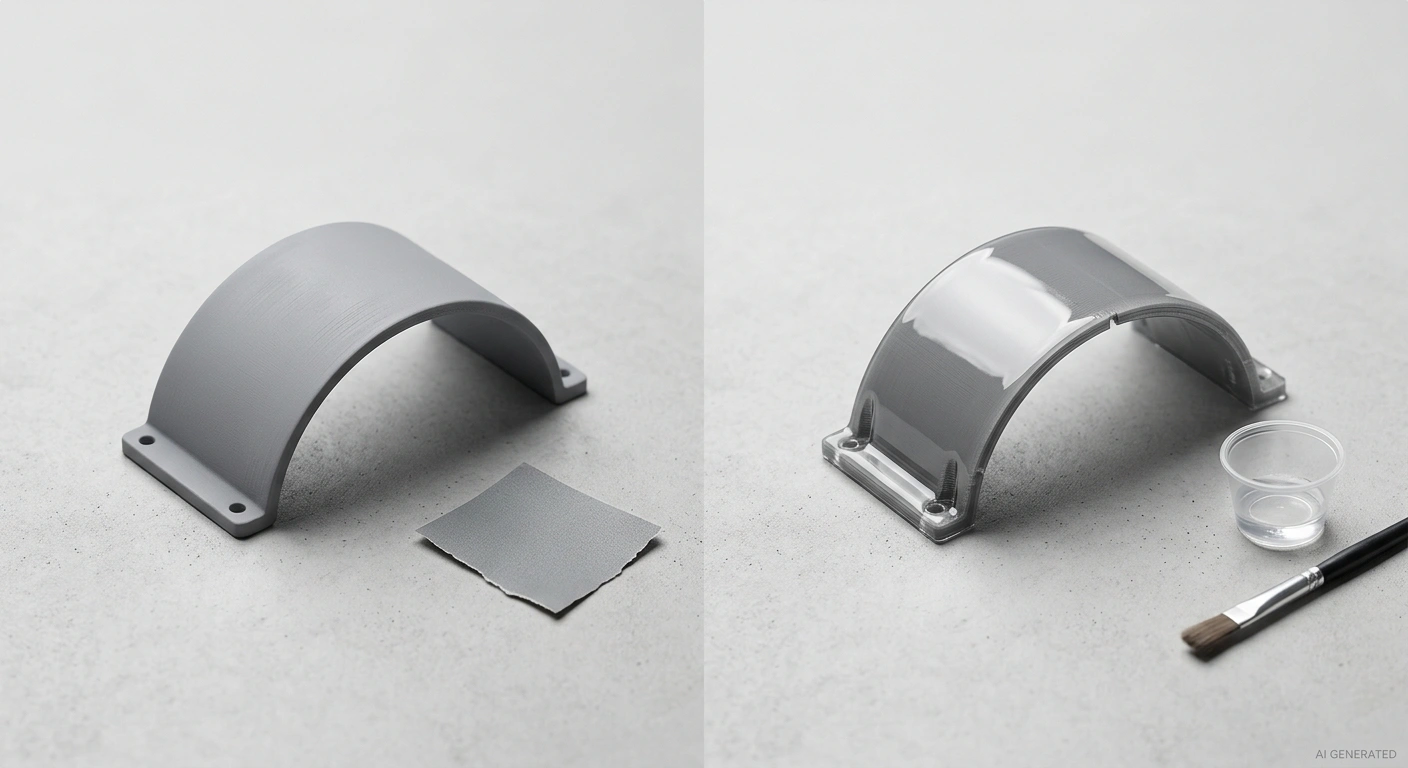
Matte PLA part finished with filler primer vs glossy epoxy coating
Apply the primer according to the product instructions and allow it to dry or cure as specified. Sand the primed surface as needed to remove remaining imperfections. If layer lines are still visible, another thin application may be required.
Filler primer adds material to the surface, so it may not be suitable for areas where precise dimensions must be maintained. Protect holes, threads, snap-fit features, and mating surfaces where coating buildup could interfere with assembly.
3Polishing PLA After Sanding
Polishing PLA works best after the surface has already been sanded. It is not an efficient way to remove deep layer lines or support scars.
For small parts, apply a plastic-compatible polishing compound with a microfiber cloth and work in small areas. Follow the product directions and use light pressure. If you use a rotary tool, keep the speed and contact time low enough to prevent heat buildup. PLA can soften from friction, leaving shiny smears or rounded details rather than a clean polish.
For a more refined finish, continue with fine wet-rated abrasives before using compound. Depending on the initial surface, this may mean moving through 800, 1000, or finer grits. You do not need to use every grade, and the final grit depends on the finish you want.
Polishing is a finishing stage, not a shortcut around sanding. If you need a painted surface, a compatible filler primer is often more useful than trying to polish the bare plastic to a mirror finish.
4Using Epoxy Coating on PLA Prints
An epoxy coating can fill print striations and create a smoother, often glossy surface. It is most suitable when a coating is acceptable and added thickness will not interfere with the part’s function.
For example, Smooth-On’s XTC-3D product information specifies a 2:1 mix ratio by volume and recommends applying a thin layer of less than 1/64 inch (about 0.4 mm). Its current product information also lists working and curing times that depend on conditions. Check the manufacturer’s latest instructions before use, since product specifications may change. Smooth-On XTC-3D instructions
Apply the coating evenly and avoid excessive buildup. Even a thin layer can change dimensions, round edges, or bridge small gaps. Mask holes, threads, slots, and mating faces if coating buildup could affect fit.
Follow the product’s safety instructions and Safety Data Sheet. Smooth-On advises avoiding eye and skin contact and inhalation, using adequate ventilation and protective equipment, and taking care because the mixed material can generate heat. Do not assume that general advice such as “work in a ventilated area” covers all product-specific precautions. XTC-3D safety information
5Heat Gun Method to Make PLA Smooth
A heat gun can make PLA smooth by softening the outermost surface, but it is one of the harder methods to control. The difference between softening a ridge and deforming the part can be small, especially on thin walls and fine details.
If you try this method, test it on a scrap print made from the same filament. Use the lowest practical heat setting, keep the gun moving, and avoid concentrating heat on one spot. A rotating stand or turntable can help you move around a decorative model, but it does not prevent overheating.
Watch for changes in gloss, sagging, rounded corners, and shrinking gaps. Stop as soon as the surface begins to change. Do not try to melt the layer lines flat. The heat required to soften them can also affect the part's shape, particularly because PLA's glass transition temperature is often around 55–60℃.
A heat gun is not the first choice for functional parts, thin-walled prints, or models with small details. Sanding and filler primer give you more control and make it easier to inspect the surface between steps.
6Does Hot Water Smooth PLA Prints?
Hot water is sometimes suggested as a way to smooth PLA because heat can soften the material. In practice, a hot-water dip is not a reliable surface-finishing method. Water around 60–70℃ can bring many PLA formulations above their glass transition range, where the part may lose stiffness and deform under its own weight or from handling.
There is also a difference between softening a plastic and smoothing its surface. A dip may change the shape without removing the visible layer lines evenly. Thin walls, clips, and dimensional features are especially vulnerable.
Our recommendation is to avoid hot-water dipping as a general PLA smoothing method. It may be useful for carefully controlled reshaping in a specific application, but it is not a predictable substitute for sanding or coating. If you need to preserve dimensions, do not use heat as a finishing shortcut.
Can You Chemically Smooth PLA?
Chemical smoothing is more challenging for ordinary PLA than for some other 3D-printing plastics. Acetone is commonly associated with ABS smoothing, but it does not reliably smooth standard PLA in the same way.
PLA formulations vary, and their response to solvents depends on the specific polymer, additives, and treatment conditions. A solvent's ability to affect a material does not automatically mean that it is suitable for controlled surface smoothing.
Vapor treatment and solvent application should also not be treated as interchangeable processes. Both require a compatible material system and a controlled procedure. Unverified chemical treatments can cause uneven surfaces, cracking, discoloration, loss of detail, or other damage.
PLA Vapour Smoothing: Does It Work?
PLA vapour smoothing, also spelled vapor smoothing, exposes a printed part to a solvent vapor that softens the outer surface. If the material responds appropriately, the softened layer can flow enough to reduce visible layer lines. The process may also round sharp edges, blur fine details, and alter dimensions.
Ethyl acetate has been investigated for smoothing PLA, but the result depends on process conditions and the specific material. This is not the same as a universally safe, repeatable home method.
Professional vapor smoothing uses a controlled setup designed for the solvent and material. An improvised sealed container with solvent vapor can create a dangerous concentration of flammable or harmful vapor. Do not heat solvents, use open flames, or operate electrical equipment that could ignite vapor in the treatment area.
For general background on the process and its limitations across materials, see this guide to 3D print vapor smoothing. For ordinary PLA prints, sanding and a compatible coating remain the more practical starting point.
Safety Considerations for Chemical Treatments
- Check material compatibility and the chemical manufacturer's instructions before use.
- Do not assume that a solvent used for ABS is suitable for PLA.
- Avoid improvised chemical mixtures or unverified vapor-treatment methods.
- Use appropriate ventilation and protective equipment as specified by the product's safety documentation.
- Keep chemicals away from ignition sources when required by their safety instructions.
- Test any compatible treatment on a spare part before using it on a finished component.
For most ordinary PLA prints, sanding, filler primer, and suitable coatings are more practical starting points than experimental solvent treatments.
A Practical Workflow for Smoothing PLA Prints
The following workflow can help organize the finishing process. Not every part requires every step; choose the stages that match the desired finish.
- Remove supports and obvious defects. Carefully remove support structures and trim unwanted protrusions.
- Sand where necessary. Remove prominent layer lines, seams, and rough spots without over-sanding edges or fine details.
- Clean the surface. Remove dust and allow the part to dry before applying any coating.
- Apply filler primer if needed. Use it to fill shallow surface defects before painting.
- Sand and repeat if necessary. Check the surface and repeat the primer-and-sanding process when imperfections remain.
- Apply paint or a suitable final coating. Follow the manufacturer's application and curing instructions.
- Check critical dimensions. Inspect holes, threads, mating surfaces, and other functional features before assembly.
For parts that do not need painting, filler primer and paint may be unnecessary. For functional parts, mask or protect dimension-critical areas throughout the finishing process.
Common PLA Smoothing Problems and How to Fix Them
| Problem | Possible cause | What to do |
|---|---|---|
| Layer lines remain visible after sanding | The surface needs further preparation, or the abrasive sequence was insufficient | Continue gradually with an appropriate abrasive, avoiding excessive material removal |
| Scratches are visible after sanding | Abrasive marks were not refined before the next finishing step | Use a finer abrasive before applying a coating |
| Layer lines remain visible through primer | The defects are deeper than the primer can fill in one application | Apply additional primer as directed and sand between applications if needed |
| Fine details disappear | Excessive sanding or too much coating buildup | Use localized finishing and reduce coating thickness |
| The part warps during heat treatment | Excessive or uneven heating | Stop heating; avoid using heat treatment on dimension-critical parts |
| The finished part no longer fits | Material was removed or coating added around functional features | Protect critical surfaces and check dimensions during finishing |
| The coating looks uneven | Inconsistent surface preparation or application | Follow the coating instructions and prepare the substrate more carefully |
The key is to match the finishing method to the defect. Sanding removes material, primer fills shallow imperfections, and coatings add a new surface layer.
Does Smoothing PLA Affect Strength and Dimensions?
Smoothing improves surface appearance, but it does not automatically improve the structural strength of a 3D-printed part.
Sanding removes material and can weaken thin sections if too much is removed. Heat can alter geometry. Primers and coatings add thickness, but that does not prove the underlying print is stronger.
The effect on dimensions depends on the method: sanding can reduce external dimensions, while coatings can increase them. Check holes, threads, snap fits, and mating surfaces after finishing, and verify that the part still meets its intended requirements.
FAQs about PLA Smoothing
Q: What is the best way to smooth PLA prints?
Sanding is a practical starting point for removing layer lines and surface defects. Filler primer is useful when preparing a part for painting, while epoxy coatings may be suitable when a smoother or glossier surface is required.
Q: Can you smooth PLA with acetone?
Acetone does not reliably smooth ordinary PLA in the same way it is commonly used to smooth ABS. Results can vary with the material formulation, so do not assume that an ABS treatment will work for PLA.
Q: Can you polish PLA to make it glossy?
Polishing can improve the appearance of a prepared PLA surface. If pronounced layer lines remain, sanding or another suitable surface-preparation step is generally needed first.
Q: Does heat smooth PLA prints?
Heat may soften the surface, but it can also deform the print or remove fine details. Heat-gun treatment is difficult to control and is not a dependable general-purpose smoothing method.
Q: Does smoothing PLA make it stronger?
Not necessarily. Smoothing primarily changes the surface. Material removal, heat exposure, and coatings can affect dimensions or the part's performance, so structural strength should not be assumed to improve.
Q: Can You Use Polyester to Smooth PLA?
No. Polymaker's Polysher system is designed for compatible PolySmooth and PolyCast filaments, not standard PLA. If you want to smooth ordinary PLA prints, sanding and filler primer are more practical options.
Q: Can You Smooth PLA Prints Without Sanding?
You can reduce the appearance of shallow imperfections without extensive sanding, but no-sanding options have limits.
- Filler primer can fill shallow defects and prepare a part for painting. It may still need light sanding for a uniform finish.
- Epoxy or another compatible coating can create a smoother surface, but adds thickness and may not hide deep layer lines.
- Heat treatment may soften the surface, but it is difficult to control and can deform the print.
If the part has deep layer lines, support scars, or an uneven surface, a primer or coating may conceal rather than remove those defects. Test your chosen method on a spare print before finishing an important part.
Beyond Smoothness: Preserve Detail and Fit
The right PLA smoothing method depends on the part's surface quality, appearance requirements, and dimensional tolerances. Sanding is a reliable starting point for many prints, while filler primer, polishing, and suitable coatings can help achieve specific finishes. Heat and chemical treatments require more caution because their results can be unpredictable.
Choose a method that improves the surface without compromising the details or functional features your part needs.
Keep Learning
Sand 3D Prints: Grits, Techniques & Materials
Key Takeaways Choose the right sanding 3D Prints approach: Consider the material, surface defects, part geometry, and required finish before starting. Select the right sandpaper grit: Start with a suitable grit and progress to finer grits to reduce scratches. Wet sanding vs. dry sanding: Choose the approach based on the material and sanding requirements. PLA requires careful heat control, while resin prints need material-specific post-processing and dust precautions. Metal parts may require alternativ......
PLA Smoothing: How to Get Smooth PLA Prints (Method-by-Method Guide)
PLA 3D prints often show visible layer lines, seams, and rough surfaces, especially on curved or angled areas. PLA smoothing helps improve surface quality and prepare parts for painting or other finishing processes. Explore these 3D print smoothing methods to learn more about different finishing techniques. However, not every method works equally well on PLA, and some techniques can affect dimensional accuracy or damage fine details. Before and after pla 3d prints smoothing This guide compares common ......
How to Smooth 3D Prints: The Main Methods from Sanding to Polishing
In the field of 3D printing, the surface quality of the finished product directly affects its appearance and functionality. Although 3D printing technology has made great progress, due to the principle of stacked printing, obvious layer lines often appear on the finished product, which not only affects the visual effect, but may also affect its performance in some applications. Therefore, it is particularly important to smooth the 3D printed parts. Smoothing can not only enhance the appearance of the ......
How to Smooth the Top Layer of a 3D Print
The top layer of a 3D print is the most visible part of the model, and problems such as uneven surfaces, gaps, or brushing can affect the appearance and usability of the print. The right settings, techniques, and post-processing can minimize these defects. If your 3D print top layer is not smooth, the cause may be incorrect print settings, insufficient top-layer thickness, or inadequate support beneath the surface. This guide covers common top-layer problems and practical ways to improve surface quali......
A Comprehensive Introduction to 3D Printing Post-Processing Techniques
Importance of 3D Post-processing Post-processing is critical in 3D printing because it provides numerous advantages that improve the overall quality and usability of printed objects. For instance, the visual appeal of 3D-printed objects is greatly enhanced by post-processing techniques. Through the use of finishes, layer line removal, and surface smoothing, post-processing can turn an uneven and textured print into a polished and smooth result. This is especially crucial for items meant for presentati......
3D Printing Spray Painting Process Revealed: Creating a Perfect Surface!
3D printing spray painting, in simple terms, is to spray color on the surface of 3D printed models to achieve the purpose of beautifying, protecting and improving the texture of the model. This process can not only enrich the visual effect of the model, but also enhance its durability and practicality. Overview of painting steps: • Model preparation: First, make sure the surface of the 3D printed model is flat, without obvious defects and support structure residue. • Surface treatment: Use sandpaper o......